Meeting KID
Ten years had passed since beginning my teaching career. It was clear to me that I needed to seriously pursue the toy, or some day it would be too late. By this time I was much better at designing. I spent a number of years on my own, learning to build furniture. I was teaching a digital art class at the Petaluma Campus of SRJC in the spring of 1997. In that class was Erin Montague (if anyone knows how to find Erin Montague, please email me). She was the only person I ever asked “Do you know anyone in the toy industry?”.
“My Brother!” she exclaimed. What are the chances?

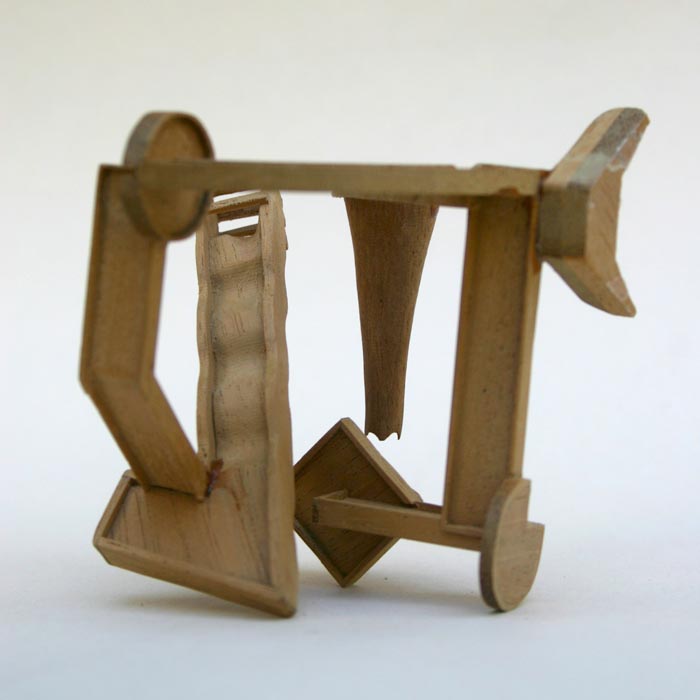
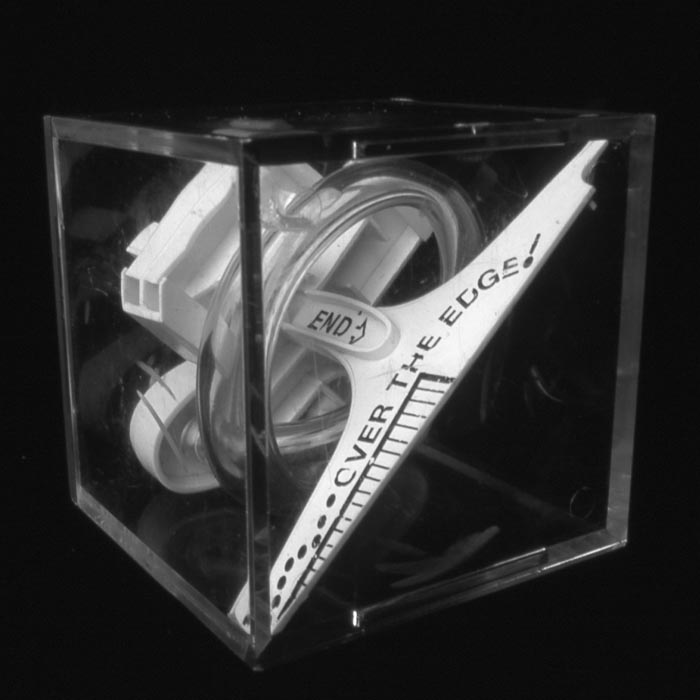
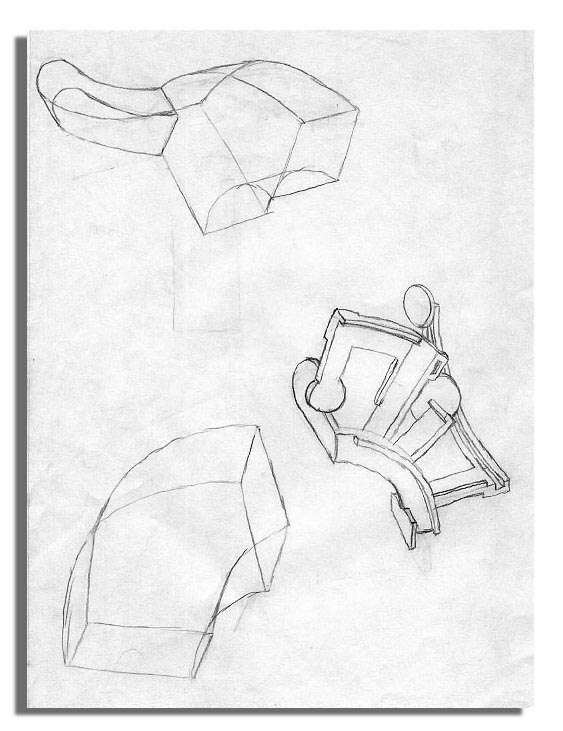
I cannot be sure but I think I’d already built the “Over The Edge!’s” (above) and showed them to John Montague, along with the original “Equilibre Hable”. But it’s possible that these were not made until later. My memory has a few gaps in it here and there. The original grouped design was so difficult to play, I put the two halves in separate boxes, which turned it into two games. Originally, the player was supposed to fall from one unit onto the other before completing the game. To this day, no one has finished either half!
These are constructed from resawn MDF and Purpleheart. MDF is less grainy than balsa, but is unappealing.
John introduced me to Dan Klitsner and his team at KID Group (now KID Interactive) in San Francisco. KID was well known and respected in the toy industry as inventors. They did not manufacture or market their ideas; they licensed them to all the major players. Though they did not work with outsiders, Dan was kind enough to allow me in because my concept was so different from their repertoire.


At our first meeting, we discussed the possibilities. Dan offered me three options. First, KID could simply introduce me to contacts, allowing me to pursue the process on my own. Second, they could be the go-between, and only do the work of showing my concept around and creating the contracts. And third, they could actively work with me on refining the concept as well as do the presenting work. I knew that their expertise was invaluable on all levels, and chose option three. Excitedly, we discussed ideas, and I loosely sketched out designs, which I’d then refine before building the model.
Over the course of two years, I worked on a series of cube models, refining concepts and meeting with KID while they pursued contacts and offered advice on design issues. Dan would say, “We have a meeting with ‘X’ tomorrow. Can you make a new model by then?” I would stay up all night, travel 50 miles to SF (each way) in the morning before teaching class in Petaluma. This was an amazing time.

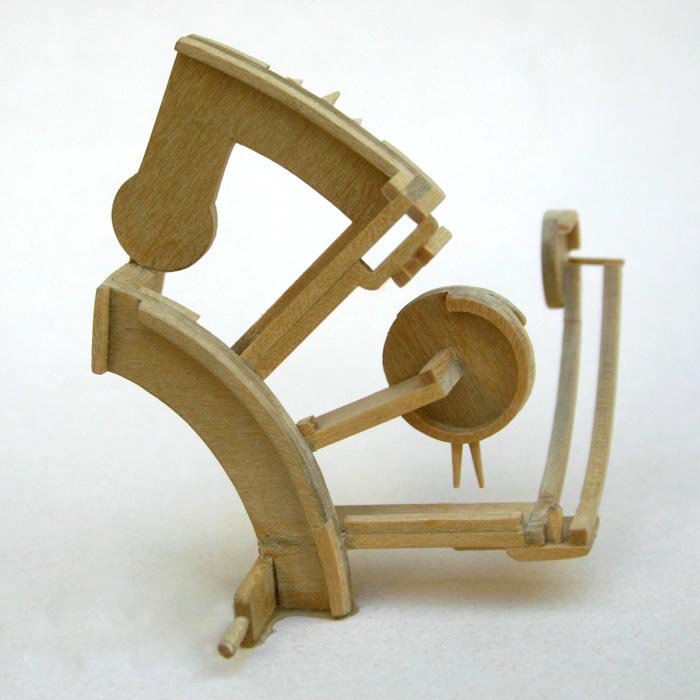
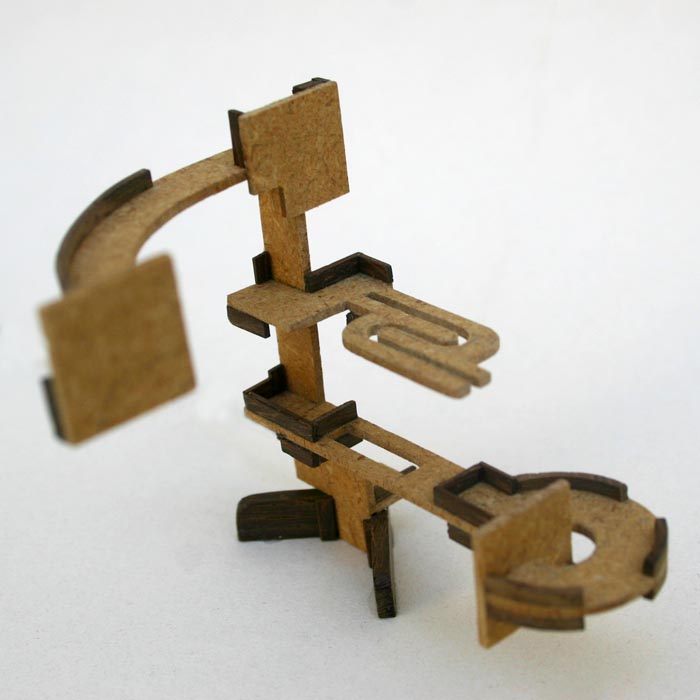
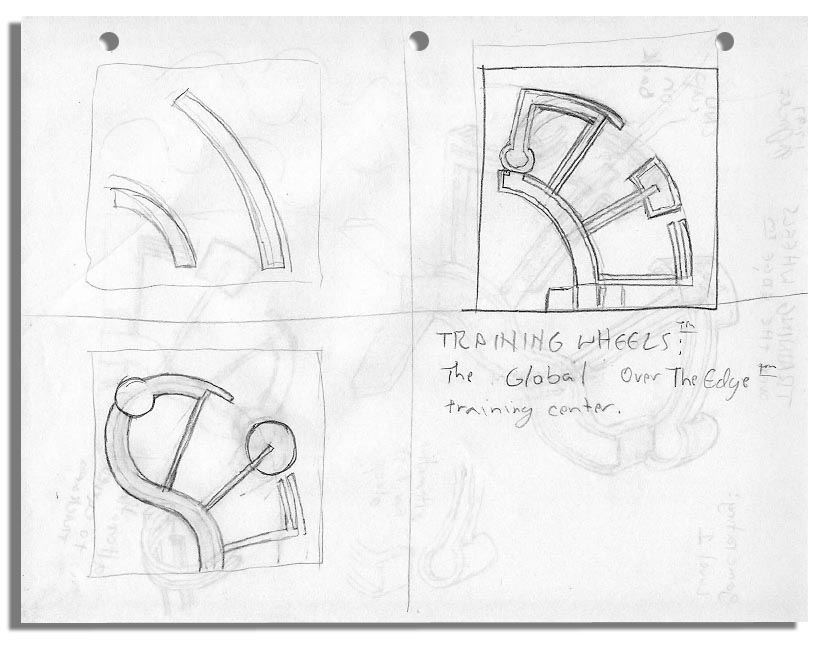
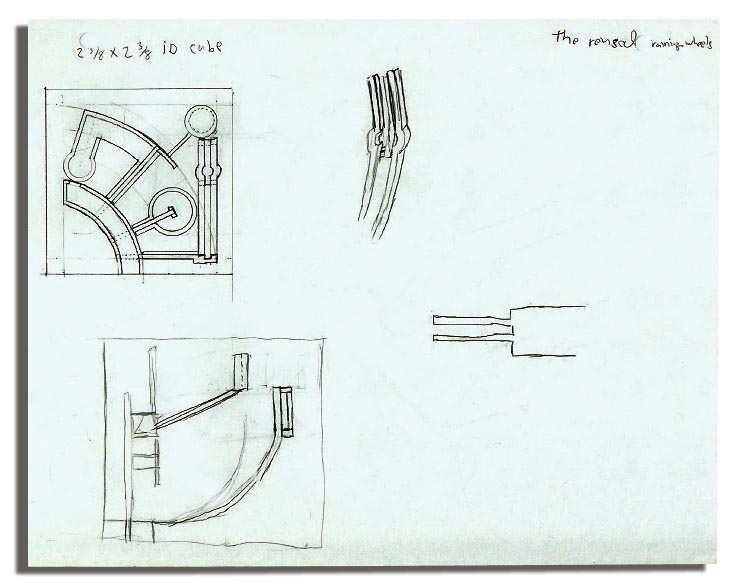
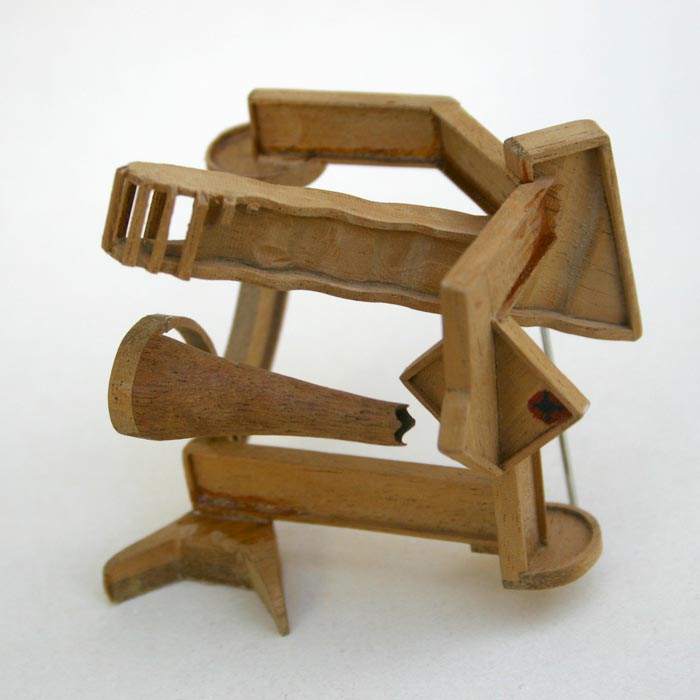
“TRAINING WHEELS” was the first design made with the manufacturing process in mind. It was designed so that there were no undercuts. The whole unit might possibly be cast in a two-part mold with all rails and pathways accounted for. Playing this version is really fun, and remains one of my favorites in style, play, and construction. For some reason the forms remind me of Alexander Calder. After bringing it to KID, we discussed how to fill the cubic space better. “TRAINING WHEELS” leaves lots of open space, and although very playable, customers might not sense the value of such a small design.

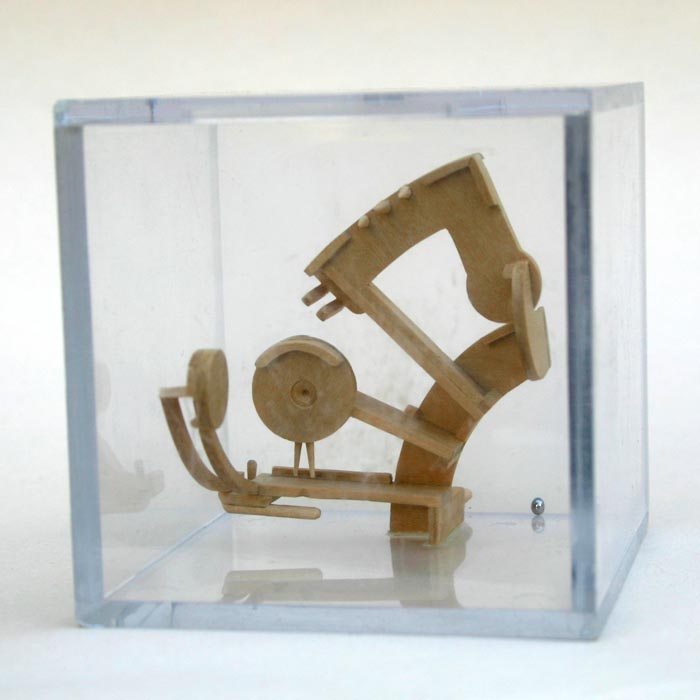
“CASCADE” was the first to use a staircase and a pivot. I think it was made out of wood. This was easier to play than “TRAINING WHEELS”. The steps made for an interesting element that would recur throughout the years. Once it was left in the hands of KID it disappeared without a chance to even photograph it. They passed “CASCADE” around to prospective licensees and no one knew where it ultimately ended up. Space-wise, it filled the cube well. One thing can be said about how the piece was actually built. It was almost assuredly different than the drawing.
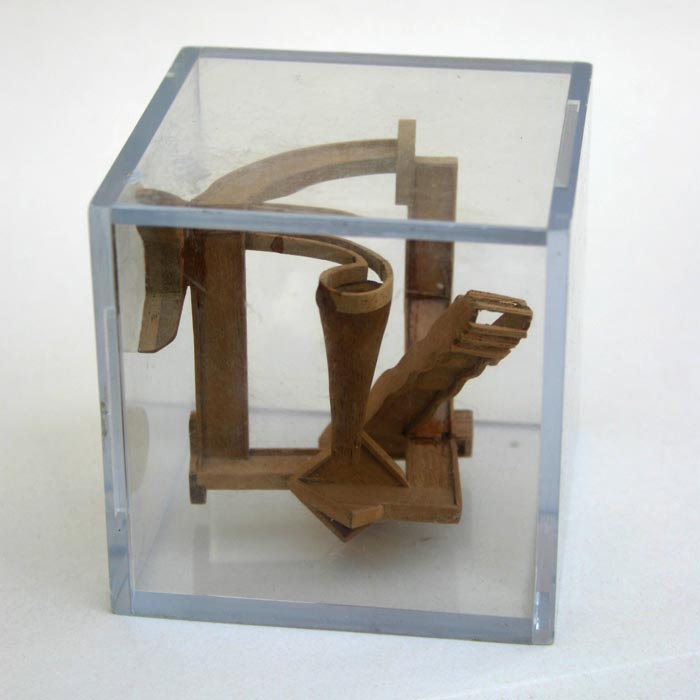
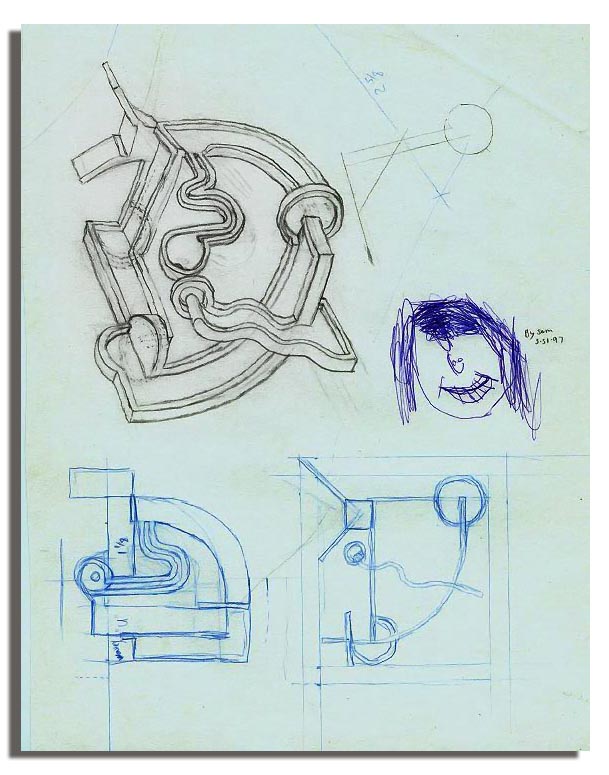
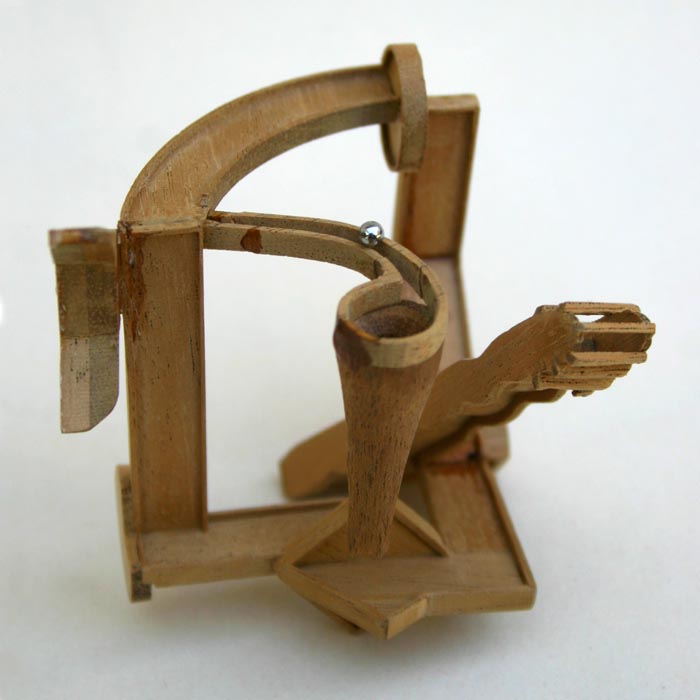
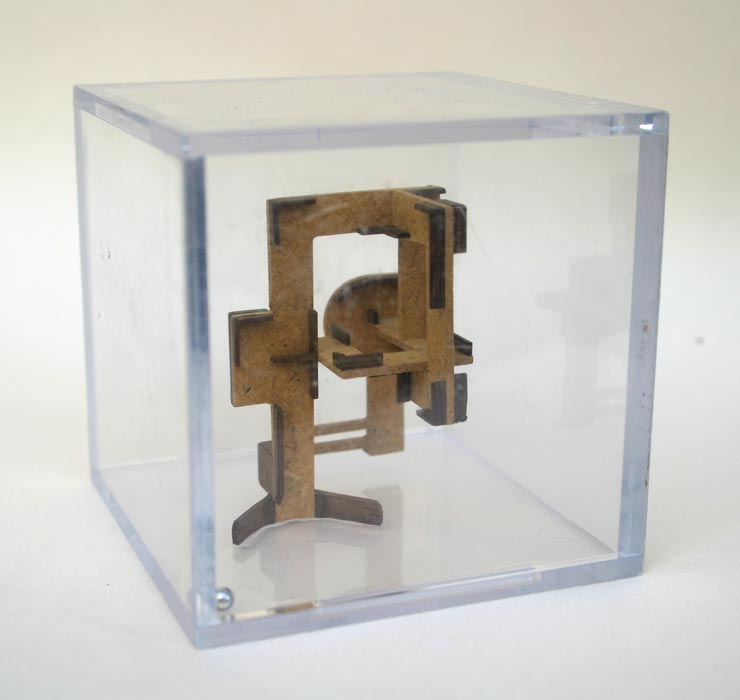
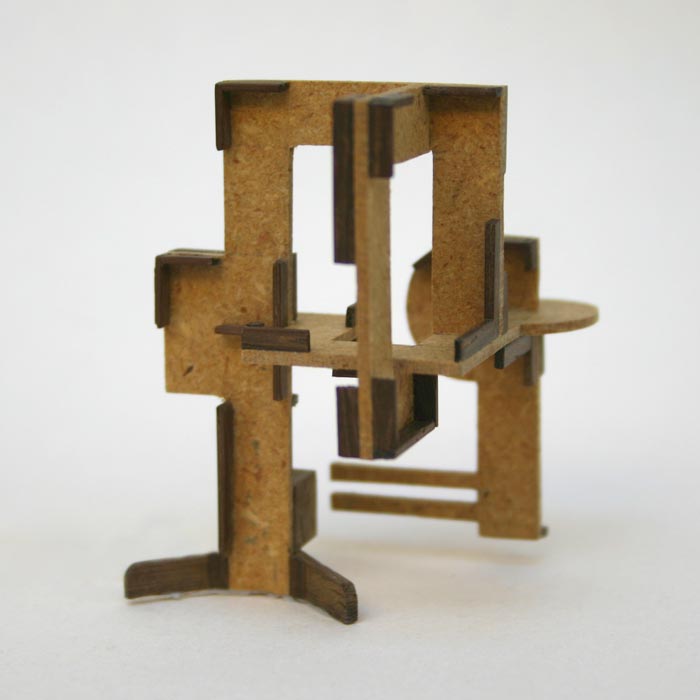
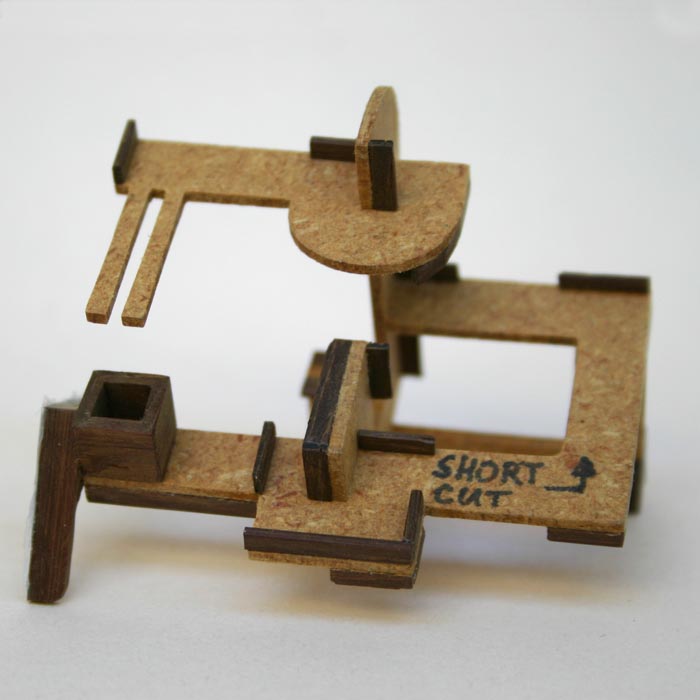
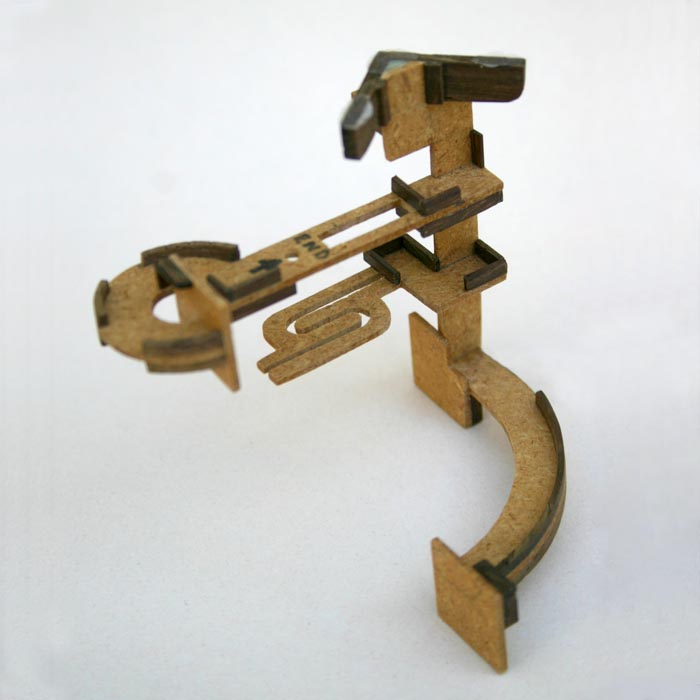
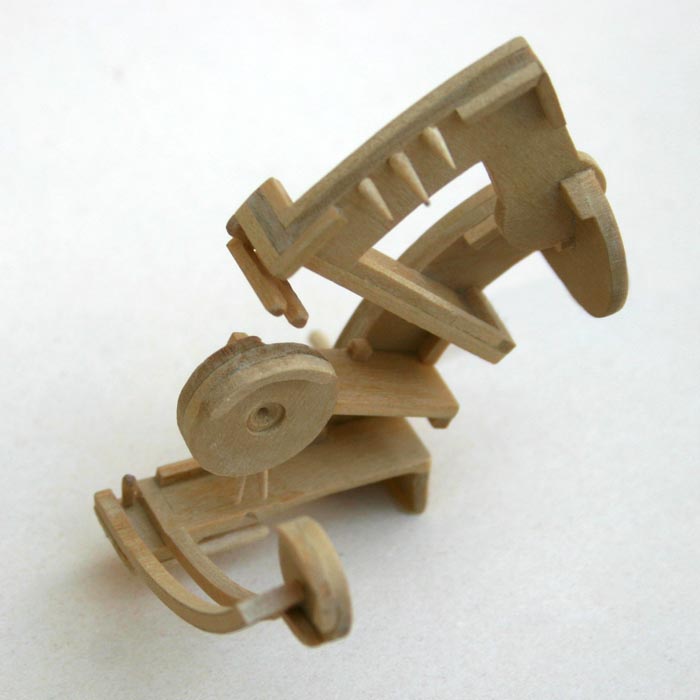
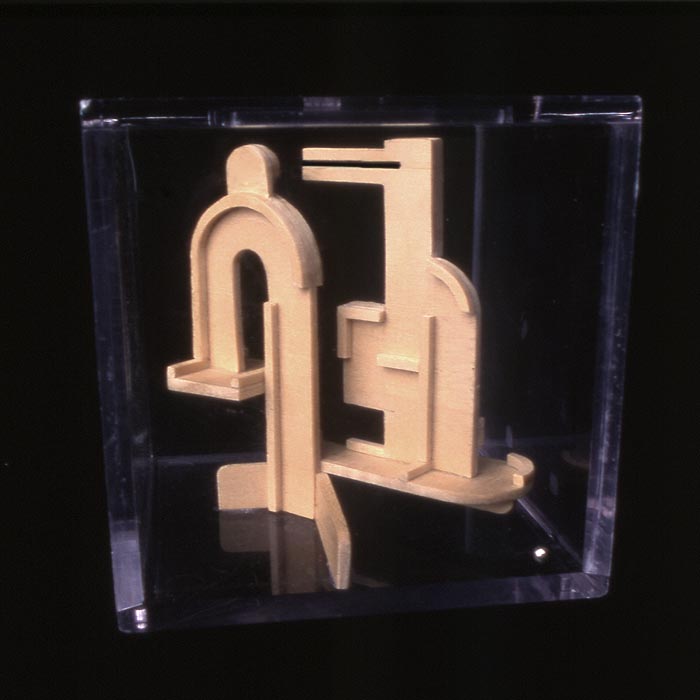
“MAHOGANY” was made from its namesake. Although this wood is wonderful for larger items, it is very poor for making tiny things with very thin and delicate parts. As can be seen, it was broken and repaired several times. Nearly every step of this version’s development was doomed. The result of having to pull off the design and construction overnight. (Even the drawing was affected; it was procured by my 5-year old son to draw a face in ink.)
The mahogany model had three new features: a funnel, a wavy surface (speed bumps), and a cage for turning around. The cage offered a real challenge, and the speed bumps did create a hazard, but the funnel was way too easy. This version had railings on all edges to make it easy to play. The theory was that if the game was too difficult, then who would want to play with it? (Me for one!) I have discovered that people readily master this version and then set it down for good. As a marketable game, it is clunky looking, has too many sharp edges, and has poor feng shui. The tension in it does make for an interesting sculpture though.
In rating the different versions so far, “MAHOGANY” would be a 2 out of 10 in difficulty, whereas “CASCADE” would be a 4, “TRAINING WHEELS” a 5, “OVER THE EDGE! #1” an 8, “OVER THE EDGE! #2” a 9, and “EQUILIBRE HABLE” a 10.
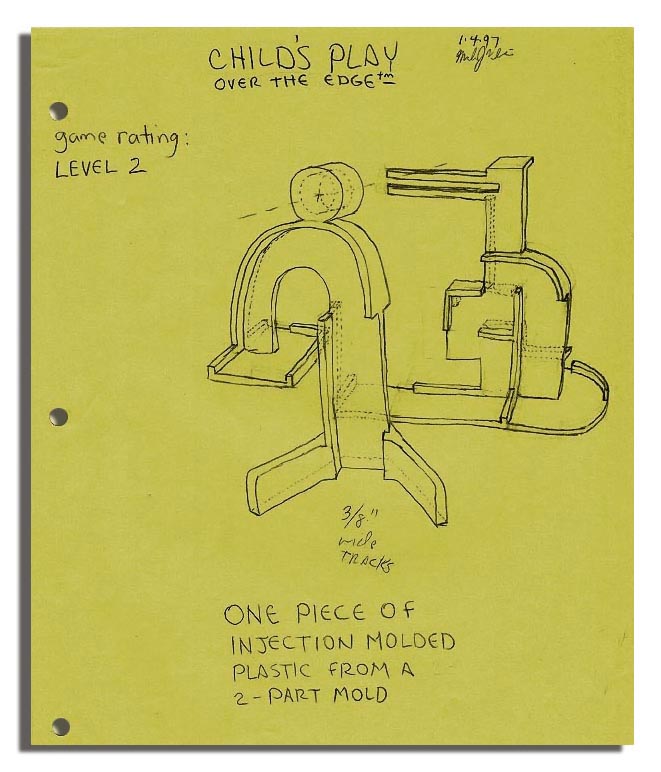

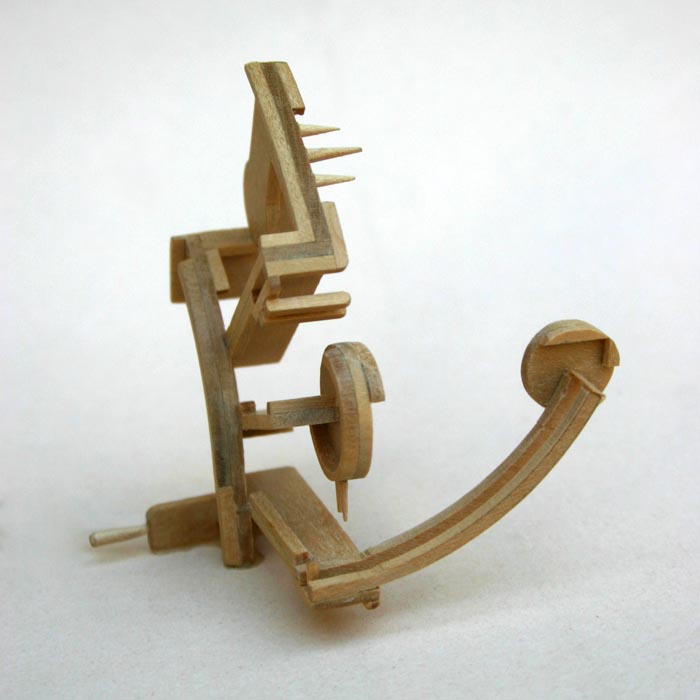
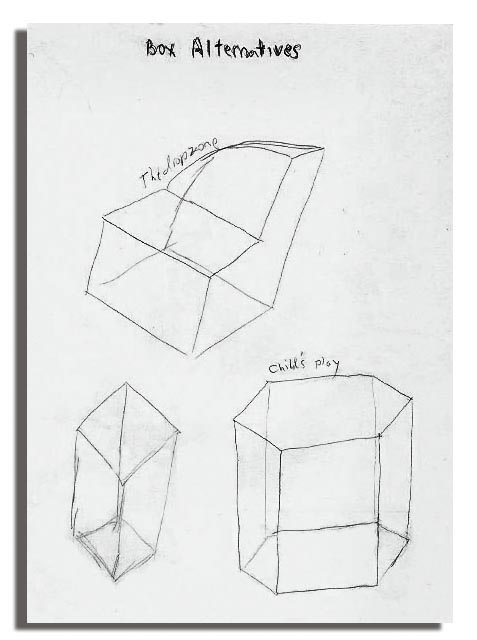
KID asked me to make a fairly easy version, but a little harder than “MAHOGANY”. One that could also be easily manufactured. I liked the results of building with birch, so “CHILD’S PLAY” was the result. This, along with “TRAINING WHEELS”, is a simple and playable design with no undercuts and is another of my favorites. It doesn’t fill the cube that much, though it sure is fun to play. I can get to the end with diligence. On the difficulty scale, I’d give it a 4 (on the drawing I rated it a “2” before it was actually constructed).
Careful attention was given to where pathways and guardrails were placed. In looking at the drawing, one can see how the position of elements were chosen to eliminate overlapping forms. This is visible by examining the piece from the front and back. Interesting. Most designs have no obvious front or back. “CHILD’S PLAY” does.

Sadly, “BABY STEPS” was not only lost, but had no sketches to go with it. No photos of any kind either. In fact, there is little I remember about it other than that KID thought that “CHILD’S PLAY” was too difficult. So I came up with a fattened design having wide tracks, a beautiful translucent blue plastic ball about a quarter-inch in diameter, fully guard-railed, and easy as heck to play (difficulty level 1). All other versions had steel bearings no more than 1/8” in diameter. “BABY STEPS” was intended for my 3-year old daughter, who was able to play it to the end. The blue ball was hers as well, and she lent it to me reluctantly fearing it might be lost. She was right.
8-97.jpg)
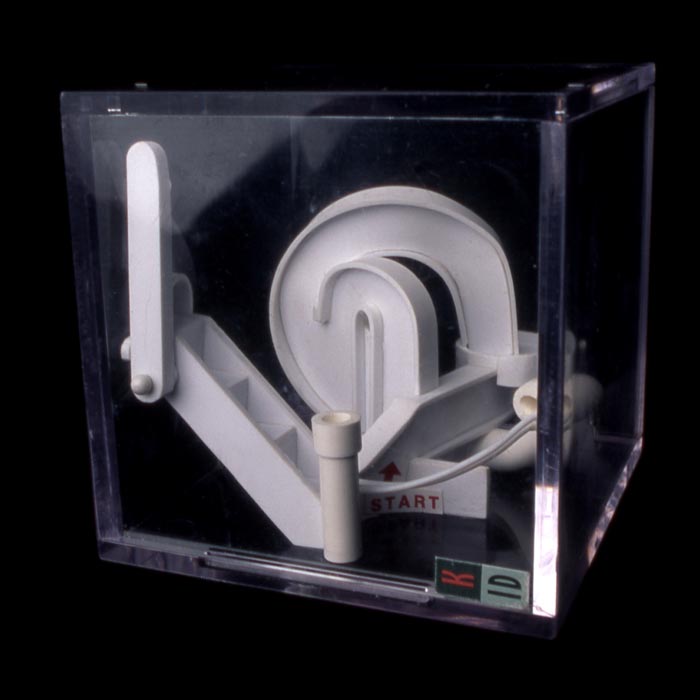

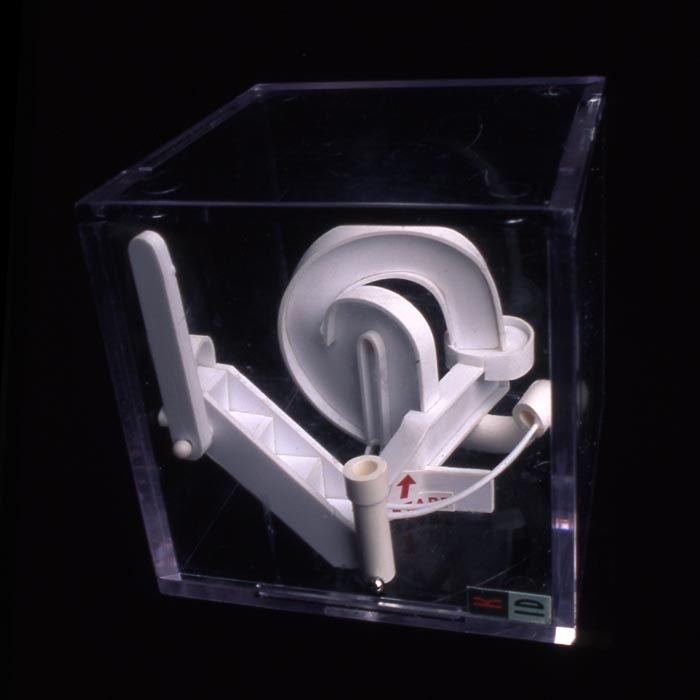
“UP RAMP” (difficulty level 3) was constructed from styrene sheet material used in the architectural modeling industry. It was worked in the same way as wood (a jeweler’s saw and tiny files) except when bending and glueing it. A heat gun softened the material enough to warp it as needed, and styrene glue instead of wood glue was used to bond the pieces. The spiral concept and tubing were new ideas that would be revisited later.
Styrene made several things possible. One, it allowed for the spiral ramp to be distorted. Two, there were manufactured tubes that could be used. And three, tiny styrene rods allowed me to make a compound curvilinear set of rails transitioning out of the tube. Bending the tubing was a bit of a trick because it would become elliptical in cross section if I was not very careful. When that happened, the ball would get stuck inside.
What I liked about the plastic was that surfaces could take on irregularity much easier than in wood. Rolling the ball on the up ramp felt like defying gravity. The tube portion created a unique challenge in that the player could not see where they were in space until the ball came out the other end. And the bent parallel rods re-oriented in space so that the player had to continually revise their level plane as they traversed it.
The white surface really looked professional to me. It reminded me of space technology like that seen in 2001 A Space Odyssey and Star Wars. This feeling about the material stuck with me as time went on.
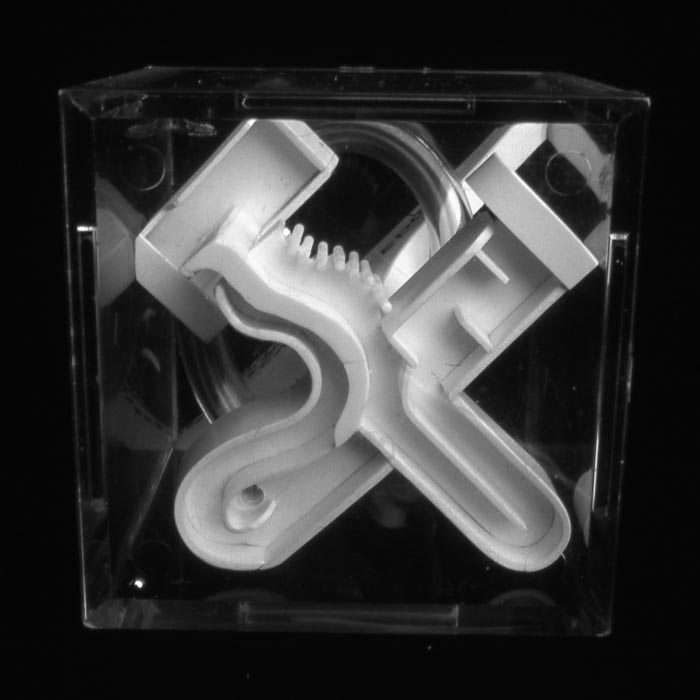
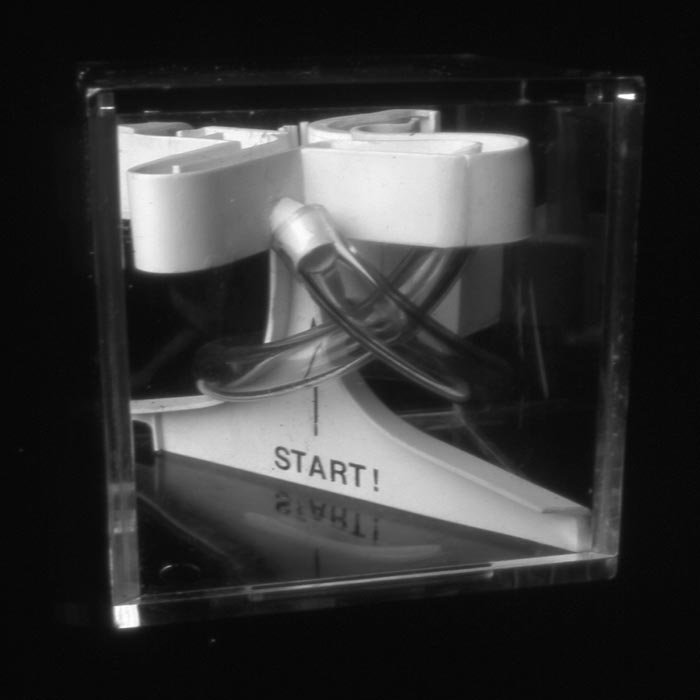
For lack of a better name, this model was another “OVER THE EDGE!” (so now I refer to it as “OVER THE EDGE! 3”). It contained a clear tube because some people were frustrated with being lost in the white tube in “UP RAMP”. What can I say about this design? It was initially created to make the START extremely easy to use. Otherwise, I think “OVER THE EDGE! 3” is weird. It certainly filled the cubic space. Unfortunately the clarity of path seen in all other versions was lost.
I’d rate it a 2½ mainly because players would lose track of where they were. This one doesn’t get picked up as much as the others. It was an ugly duckling, but I don’t think it will turn into a swan.

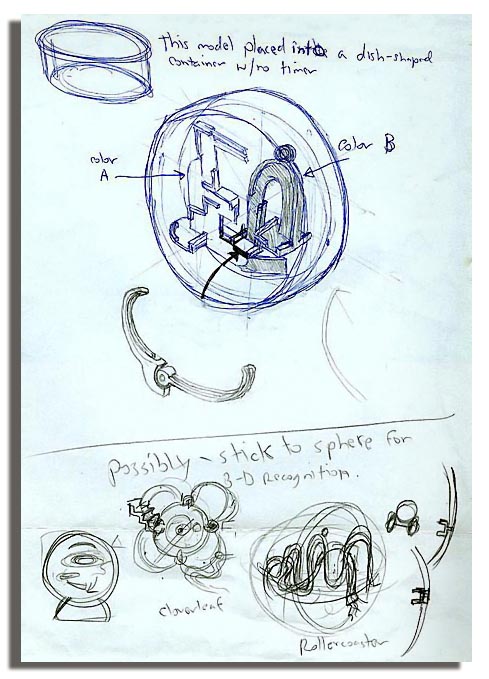
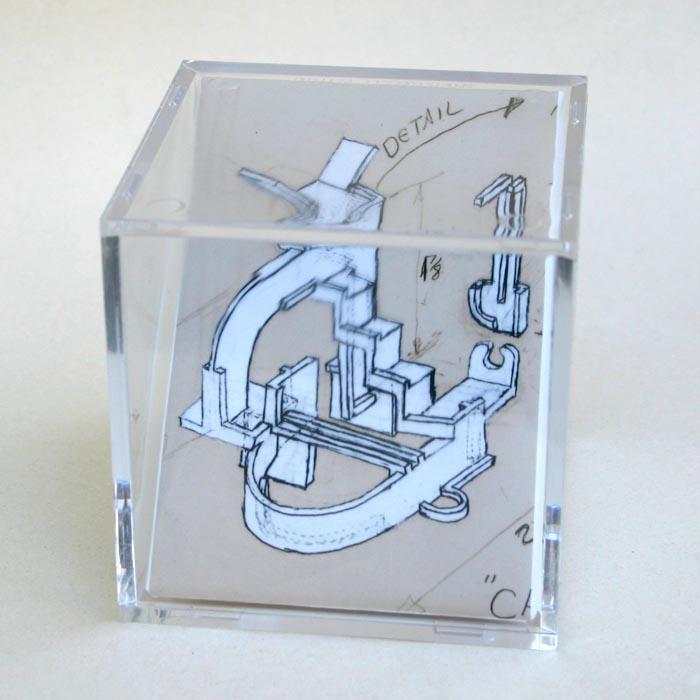
Eventually, KID and I worked toward getting away from the cube. A logical choice was a sphere. But we had bigger ideas, like modular units that could be interlocked to make more complex hybrid games. This could be achieved by designing cases for different models that had connection keys and openings so that users could create their own super-games. The concept didn’t get explored very deeply. As seen at the bottom of the drawing to the right (above), we decided that a sphere was next on the agenda.
There were four reasons I resisted the sphere up to this point:
- I was attached to the classic look of the cube.
- I didn’t know where to find spheres for the prototype (lame excuse).
- I was concerned that the shine on a sphere would be troublesome (true).
- A sphere would require some kind of stand or base (very true, and ultimately both good and bad).
As you will see, in time the sphere became a major element.