Superplexus Circles
2007 Foam board, illustration board, card stock, tacky glue, sewing pins, PEX tubing, PE pipe, wood, electrical conduit, assorted hardware
74 x 48 x 64 ″
Destroyed in 2012.
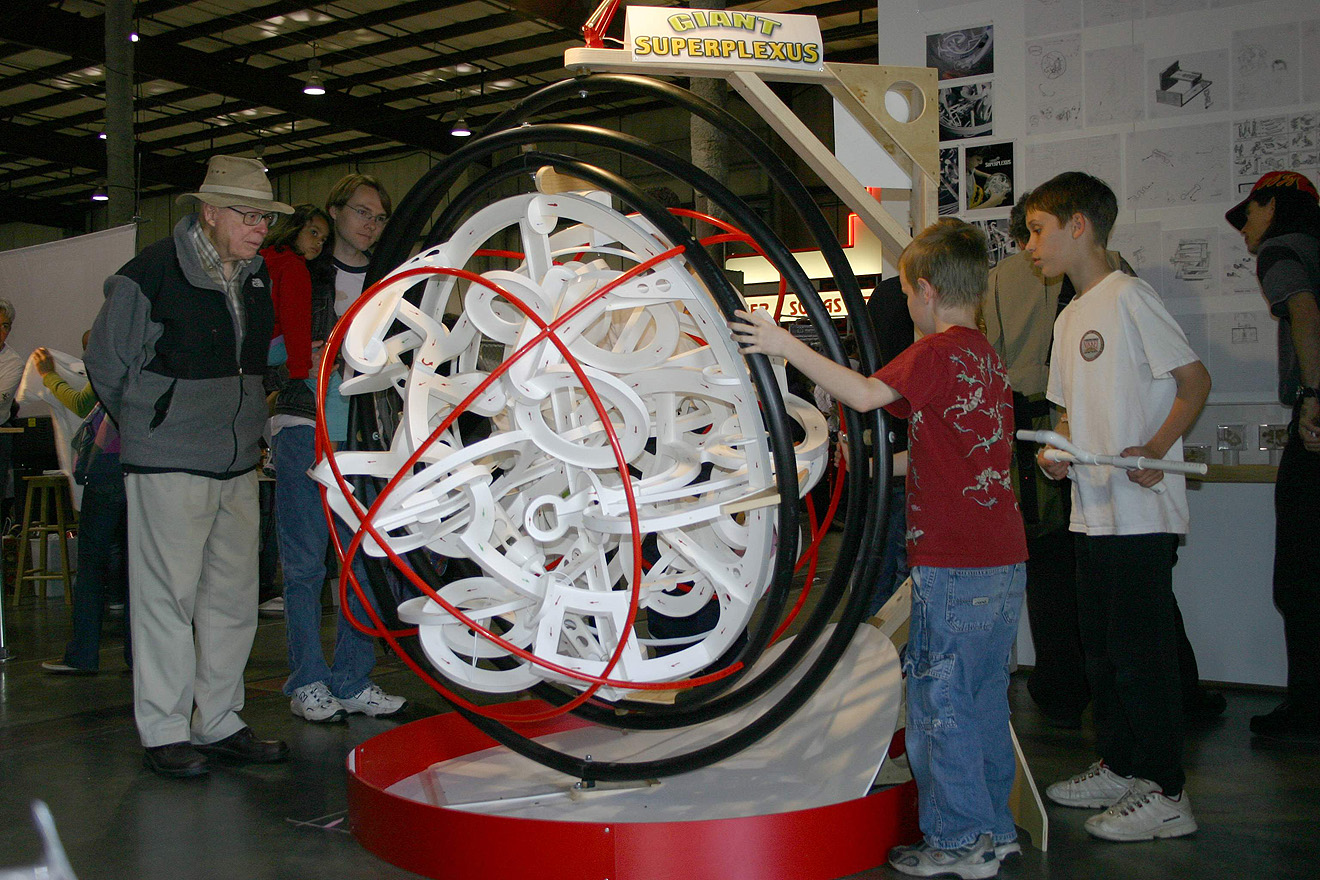
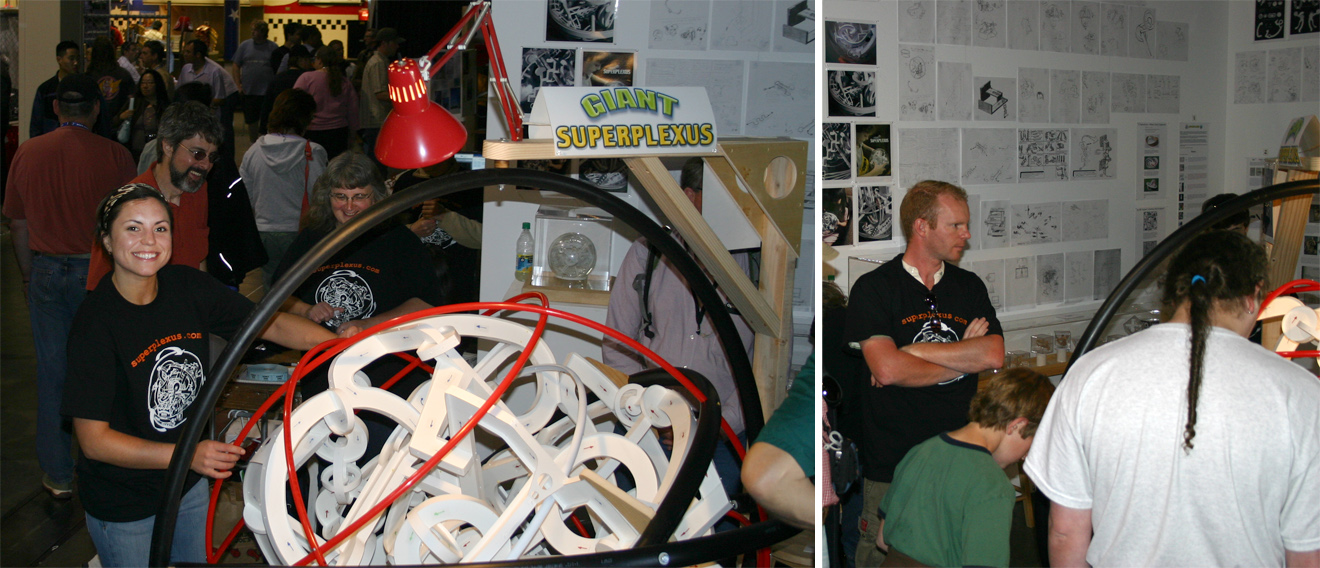
Also referred to as GIANT SUPERPLEXUS, Superplexus Circles was my first large-scale work in this new genre. It was built as a test in response to an invitation by Mark Frauenfelder, the Editor in Chief of MAKE MAGAZINE. He asked me to showcase the development of Perplexus at the 2007 Maker Faire. Mark contacted me on April 1st, and the faire took place on May 19th and 20th in San Mateo, California, which meant I had a month and a half to prepare. This opportunity gave me an idea: why not tackle my dream of creating a super-complex, human-scale interactive piece? Up to this point, I was fearful of what it would take to even begin such a project, but the invitation gave me the bravery (and deadline) to go for it.
Designing the pathway
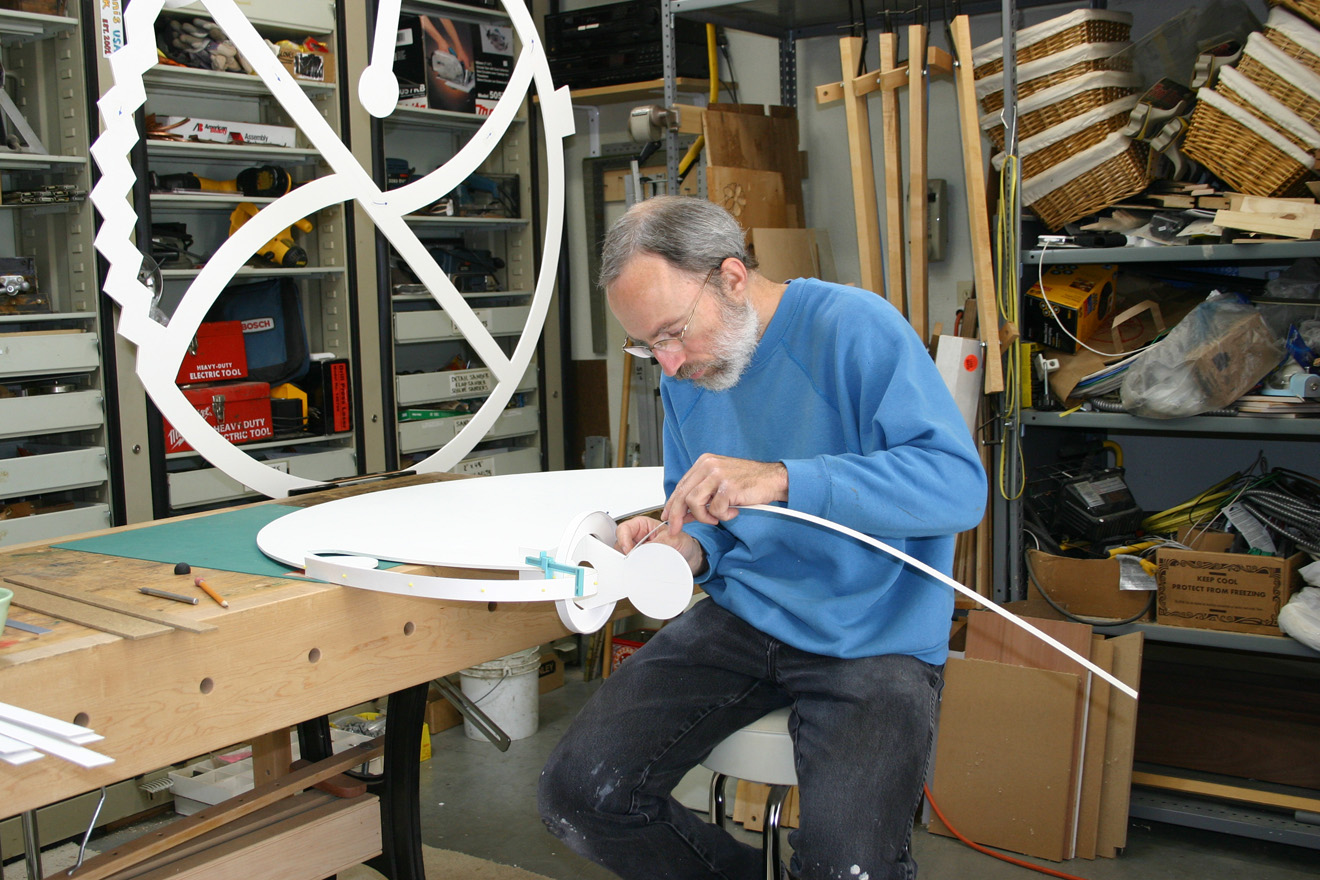
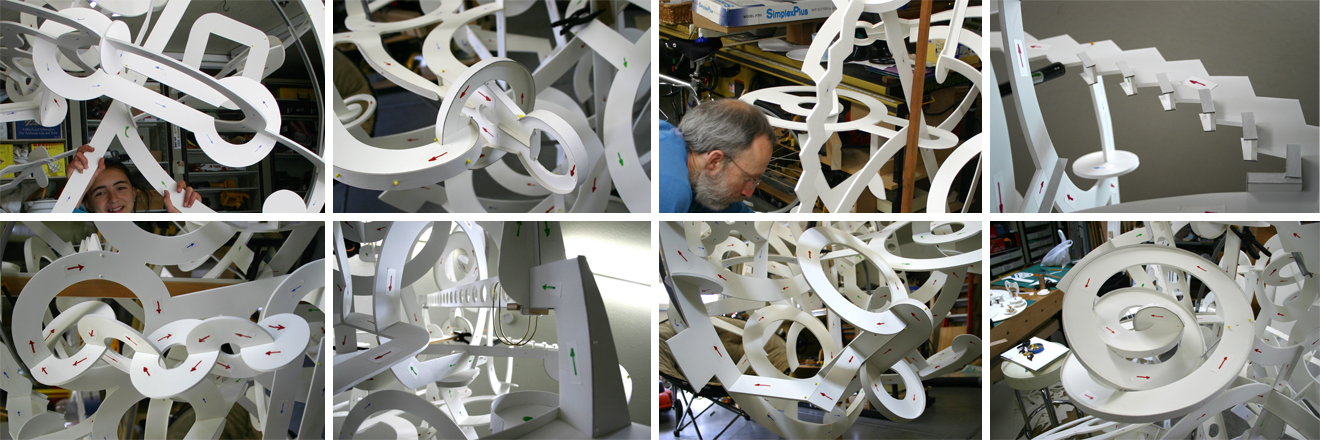
The process began on April 4th with the acquisition of a quarter-inch thick 4′ x 8′ sheet of foam board. I had no pre-conceived ideas, and no sketches either. Creating such a complex piece was a difficult process for me that tested the limits of my mental capabilities, so without any drawings, I worked directly in the raw material. Scale was determined by the sheet size, which allowed me to draw a 24″ radius, and to add support flanges every 120°. I referred to this piece as the Equatorial Plane because it provided a method of mounting the Superplexus to a gimbal. My only plan was to create an outer circular pathway which would act as a support structure, and then to create internal crossings for strength and complexity. My only tools were a tape measure, beam compass, pencil, eraser, straight-edge, and craft knife.
The second plane, placed at 90° to the Equatorial Plane, was cut from the remaining piece of foam board. I had no idea how to integrate it or what to remove, so I began by fitting it across the diameter of the equator. This helped me define where to place voids. The difficulty was in maintaining three attributes: structure, function, and aesthetics. As a kinetic sculpture, the form needed to be visually strong, but as a game, it had to be a 3D labyrinth. Because of its appearance the second plane became what I call the Mosquito. The Ankh was formed at one end of this plane. It is important to me to name each part because it gives them personality and a way for me to contextualize my designs.
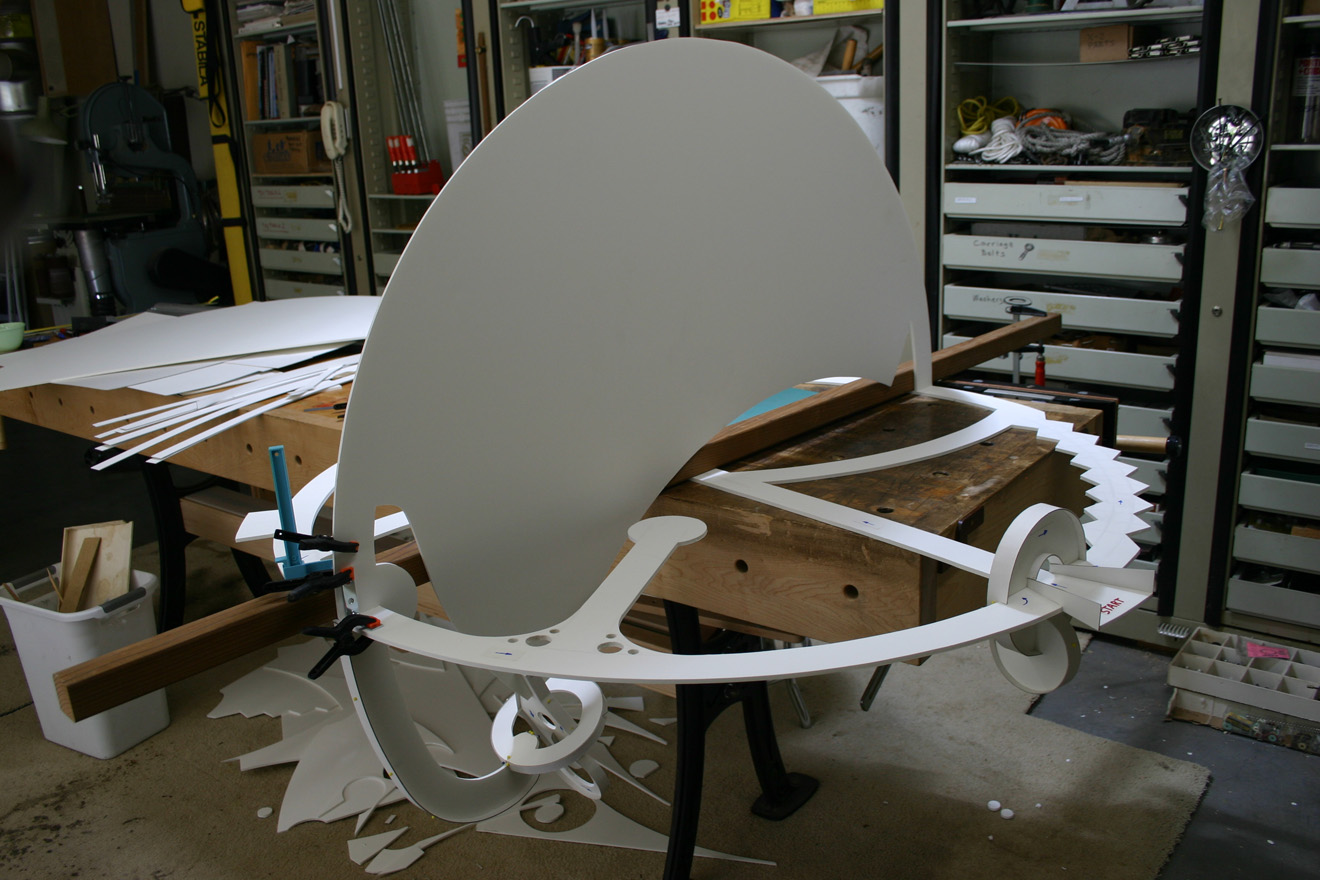
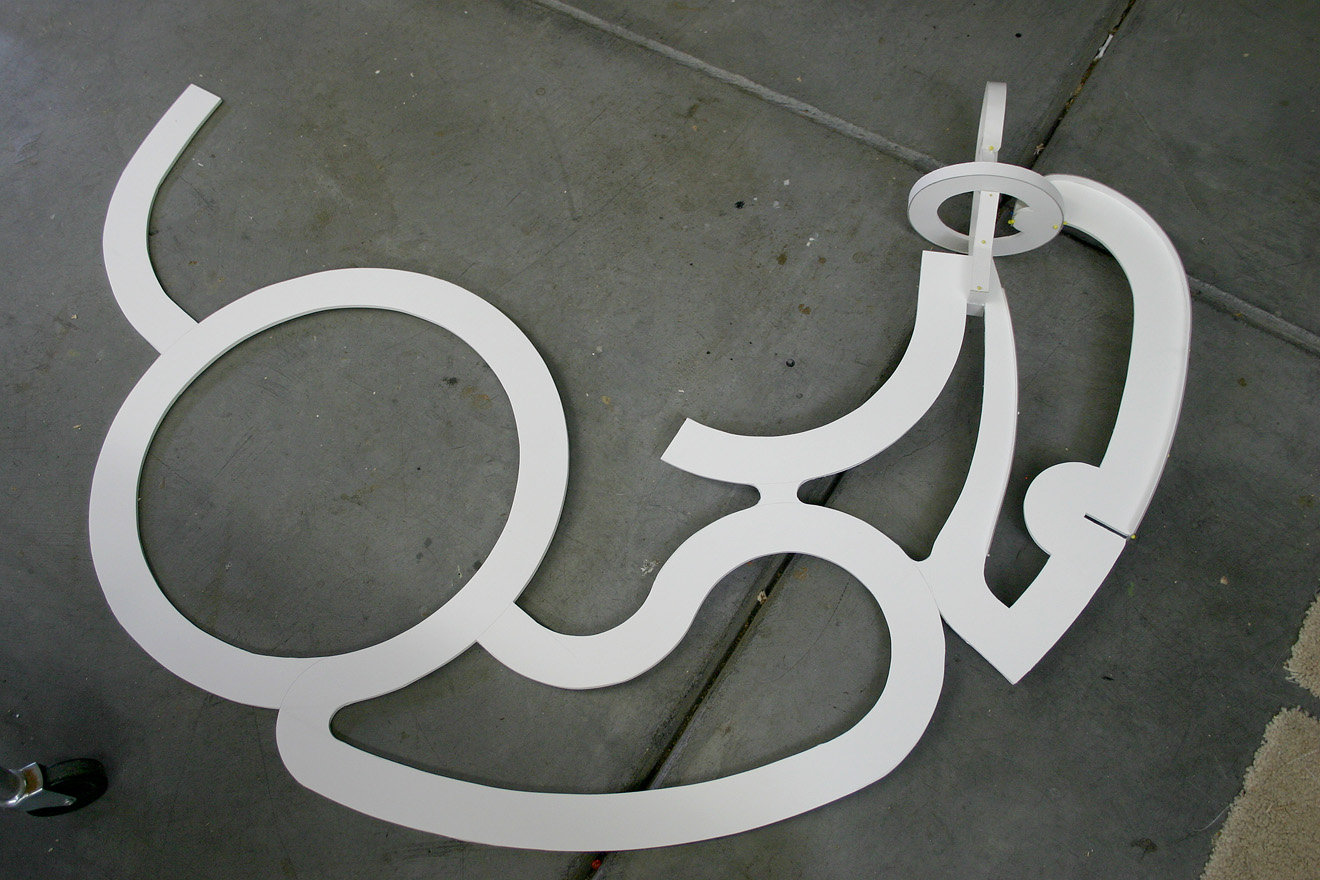
Each new plane added form to the structure. The names were growing: Dog Bone, Enterprise, Double-Donut, Steps, Tight Rope, Carriage, Rings and Non-Planar Spiral. It was taking shape as a spherical volume, but was still unresolved. Other processes were necessary to make it an interactive piece. During this stage, I received a visit from my pal, John Watrous, a great friend and mentor since enrolling in his seminal 1981 sculpture class. Out of concern for my well being, he suggested the work needn’t be so complex. As a pure art object, he had a point. It would have been formally strong even in much simpler arrangements. Much as I appreciated his insight, I had a vision,and felt the need to produce a seriously involved piece; a tours de force.
Superplexus Circles did not fit into a typical aesthetic category, so it was difficult to make a comparison to other work. As Louis Sullivan said, “form ever follows function”. It existed as a sculpture, and as an interactive spatial problem-solving game. At its core was a need to make both sides of every surface a part of the path, and for it to be aesthetically strong.
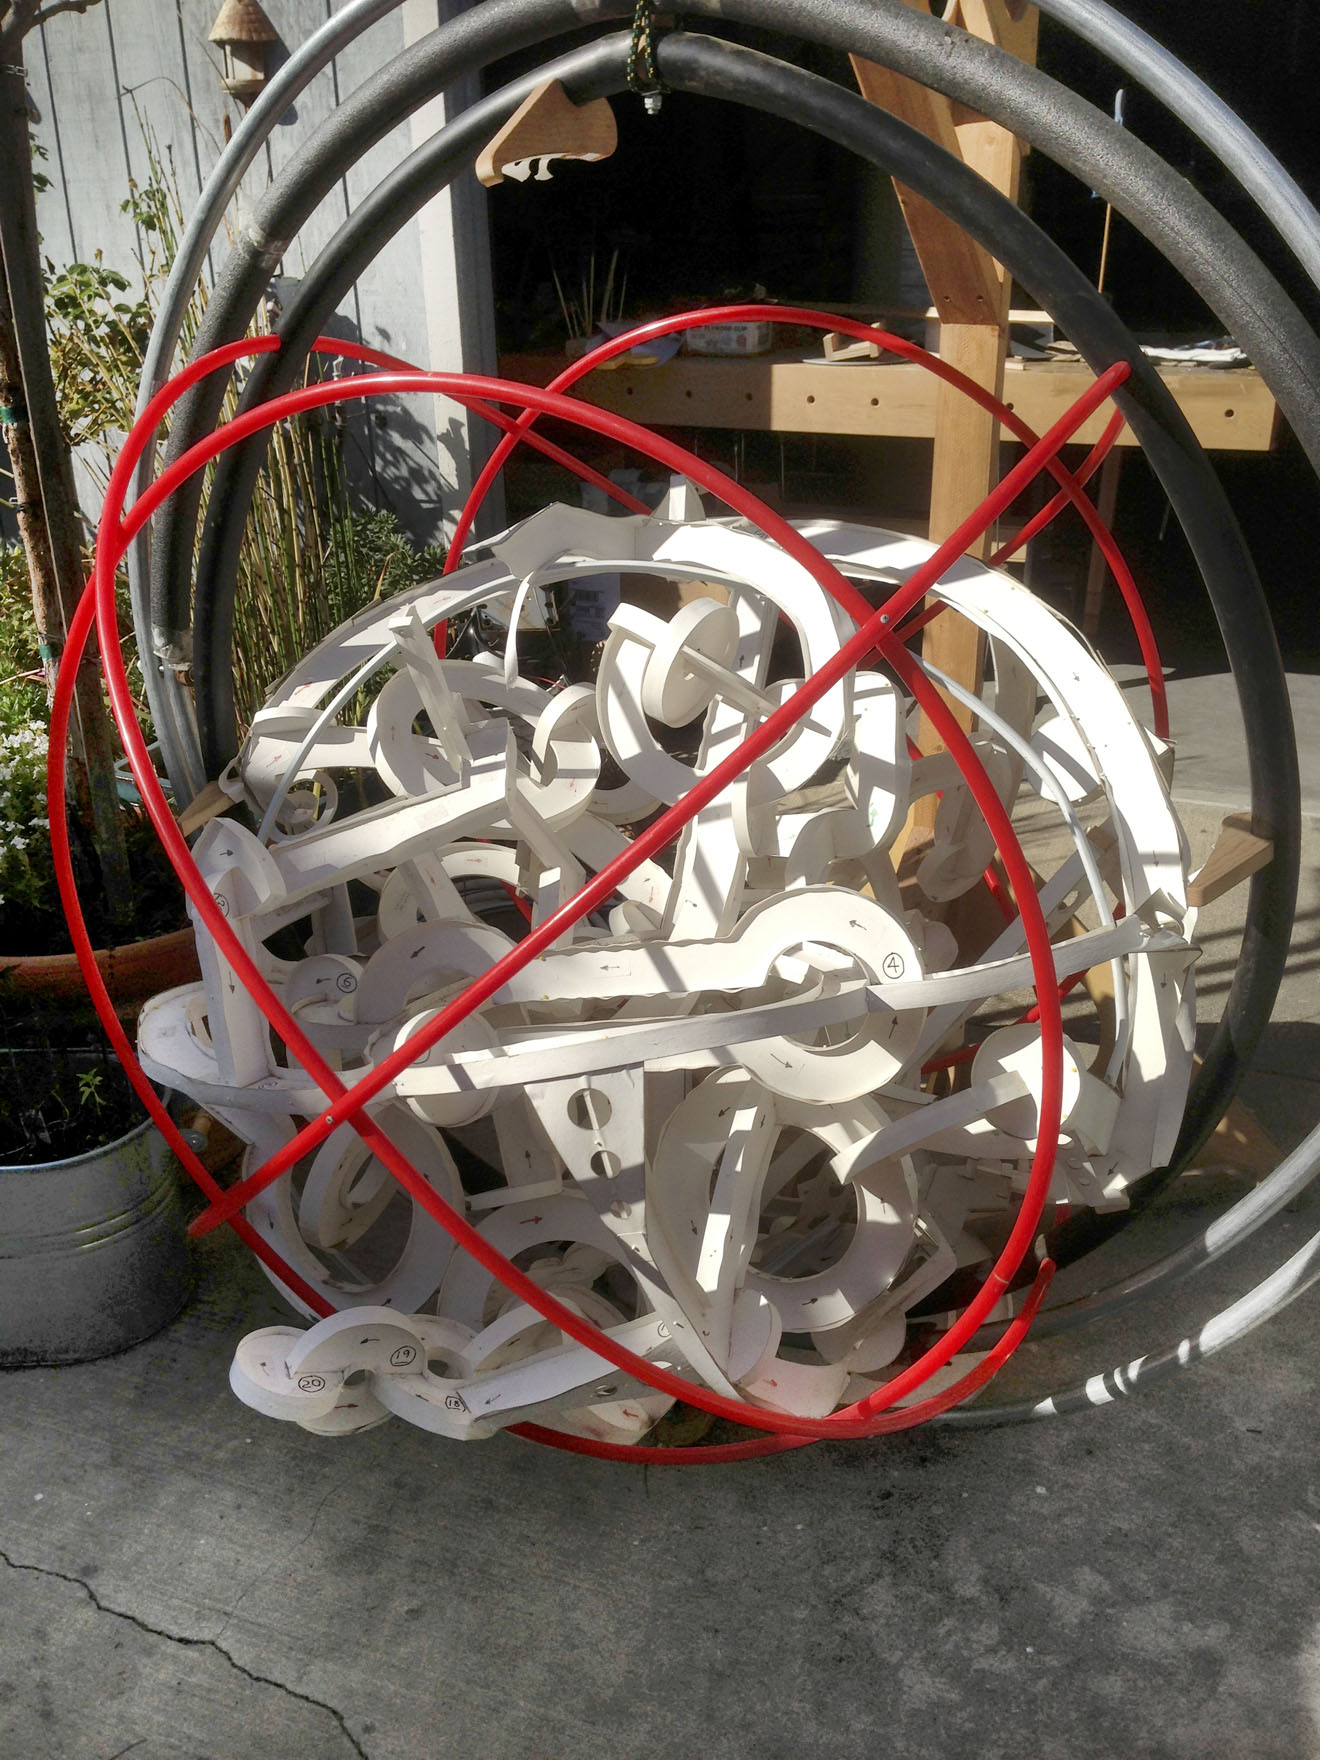
It was a difficult task to figure out if the pathway had continuity. I made a collection of colored arrows on white tape, cut into rectangles. Beginning with red, I placed the arrows along the progressing path leading from the START position. At one point the pathway simply ended, and I decided to go backwards from the END, which I arrowed in green. There turned out to be a third section which I labelled with blue arrows. This one formed a continuous loop with no beginning or end, which explained why it was difficult for me to discover early on; it had no dead-ends to find, so in a way, it existed in its own universe, cohabitant yet invisible. As I created new turn-arounds and linkages, many arrows had to change direction and even colors, sometimes hundreds of them at a time.
Poster board and card stock rails were added as the structure was made. This gave the Superplexus near-functionality as well as much greater strength. Each pathway became an H-Beam or T-Beam. The combination of interconnected paths and rails made the sculptural aspect more volumetric. Railings were necessary to allow the ball to travel the path, but they also acted as a visual element giving the piece its curvilinear qualities.
I regulated the pathway difficulty by railing length, height, and position. They were affixed in place using tacky glue, which bonded the paper and foam board very well. Since clamping was next to impossible, the rails were secured with sewing pins while the glue set. The tacky glue filled small gaps and remained flexible throughout Superplexus Circles’ life. It took well over 100 hours to finish the pathway structure.
Making the gimbal
It was time to make a gimbal. Without it, I could only surmise playability. I had no experience making a gimbal and had little to go on, but figured that two rings would create full freedom of movement with one ring inside the other pivoting perpendicularly to each other. In this way, the pathway structure might move freely. It was very intimidating figuring out and locating materials for rings, pivots, and the overall structural support. My desire was to make the gimbal very light weight, and figured that plastic tubing would be ideal. Scouring the internet and local hardware stores, I eventually found a 100′ roll of 1.5-inch ID black Polyethylene pipe normally used for irrigation. It was very light, and somewhat flexible, and already in about a 5′ diameter roll, so shaping it into large rings seemed plausible. The size of the pipe seemed suitable because it was rigid enough to maintain its ring form.
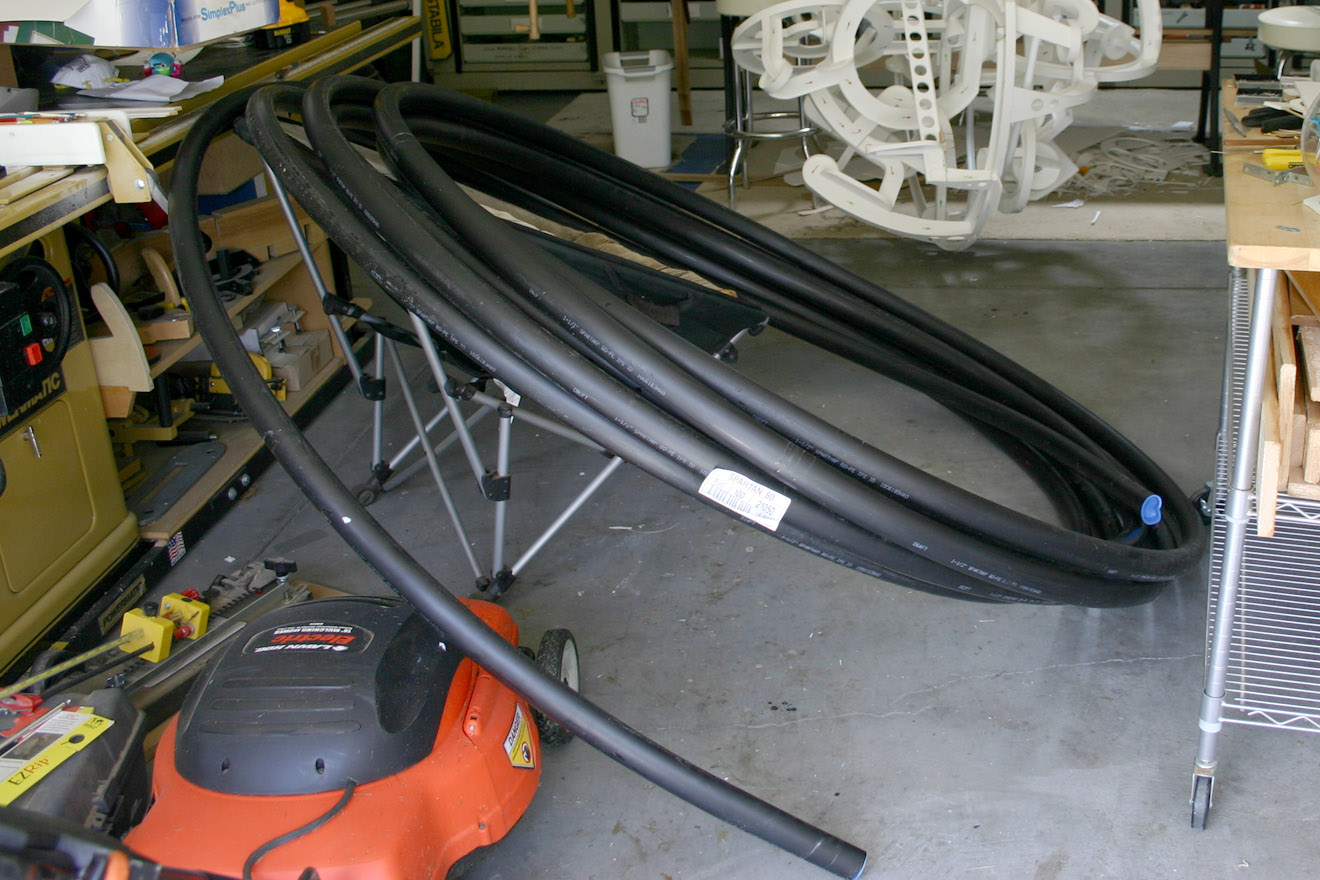
I cut the inner ring first, and made a wooden plug that could join the two ends together. It was shaped to the contour of the ring so as to avoid a flat spot. The plug was friction fit, with screws added for security. Next came the outer ring, large enough to accommodate hardwood spacers held in place with bolts and lock nuts. This was secured into a wooden C-frame with triangular braces, and tested for spin, which seemed fine.
The pathway structure was secured in place with wooden fins that were glued to the poster board rails and screwed to the plastic inner ring. This was a strong connection that lasted through five years of abuse. The ringed unit was fitted into the rest of the gimbal and tested again, this time for playability. Amazingly, it spun easily! Unfortunately, there was not enough freedom in all degrees of rotation. Roll, pitch, and yaw describes 3-dimensional rotation, and one of those was missing. It was impossible to align certain track sections with the plane of the earth, which meant that parts of the track could not be navigated.
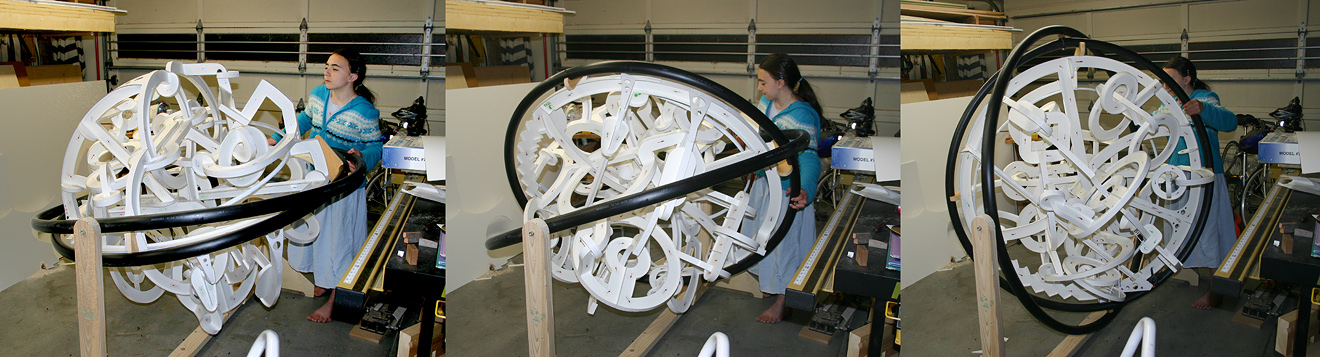
The gimbal needed one more ring, and that meant rebuilding the C-frame to fit the newly enlarged gimbal. Originally, I expected the C-frame to sit parallel to the earth but because of its size, it became awkward. Also, when the third ring was added, it introduced a new level of flex in the system, and when all rings were in plane with one another, sag was significant enough that it made the structure difficult to maneuver. I pivoted the C-frame 90°, or perpendicular to the ground, and the problem was nearly alleviated.
Finally, I added some red PEX tubing (left over from our radiant heating system) and created a cage to protect the pathways from direct handling. The red color helped define the outer region of the spherical form, acting like a “Do Not Cross” line, and a handle for manipulating Superplexus Circles.

Finding the perfect ball
I’m not exactly sure when I found the perfect ball for Superplexus Circles, but when I did I knew it was right. For the small Perplexus games, steel ball bearings were appropriate. Such a thing would trash the light weight Circles structure. I entertained the use of wooden balls, but found that an old foam mouse ball had the right softness and density to play without too much bounce or damage. (Interestingly, a man approached me at the Maker Faire and told me he worked for Logitech and helped design that mouse ball! It was a wonder of industrial design and functionality, but people never understood its qualities. Sadly, that ball was lost at an event a year later, and was replaced with wood.)

The Maker Faire, May 19-20, 2007
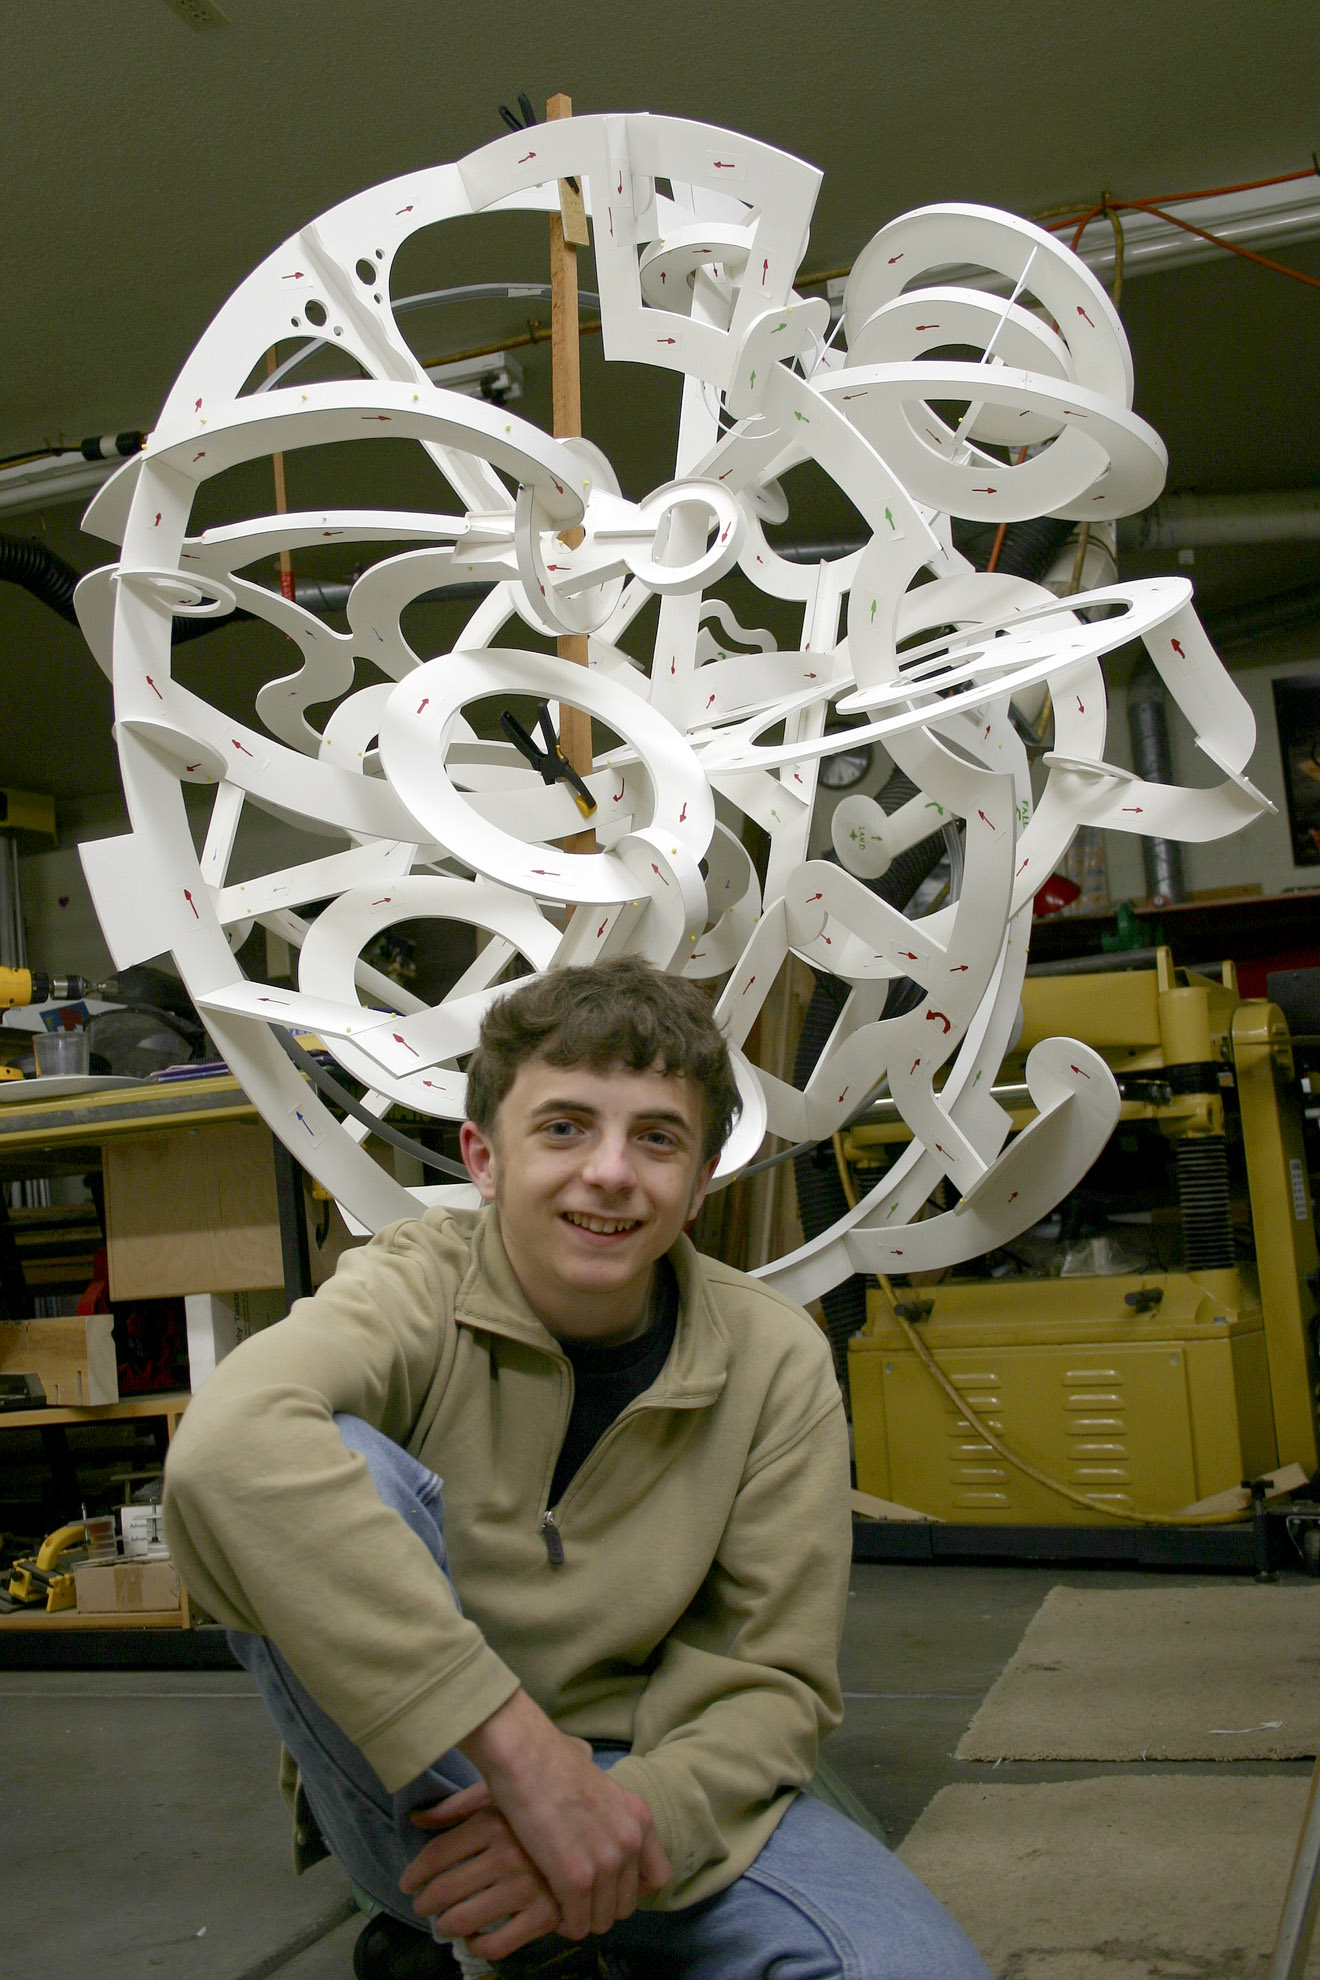
Hauling Superplexus Circles and my display of, “The History of Perplexus”, to the Maker Faire required a good-sized box truck. My wife, kids, and brother Tim helped in this endeavor. We set up walls and stands loaned from the SRJC Art Gallery (I was their Exhibits Specialist, a job I held for fourteen years).
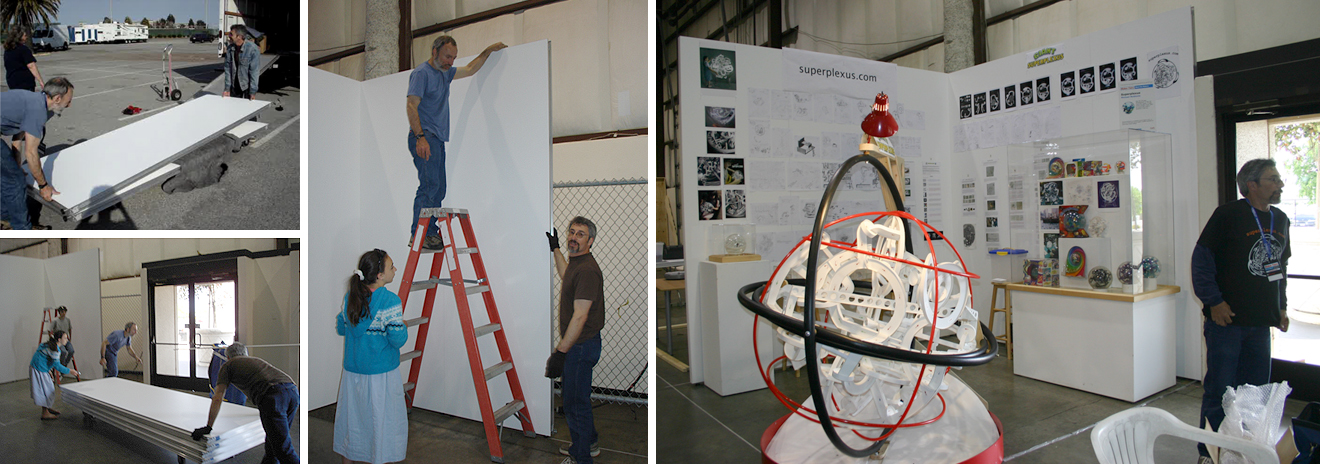
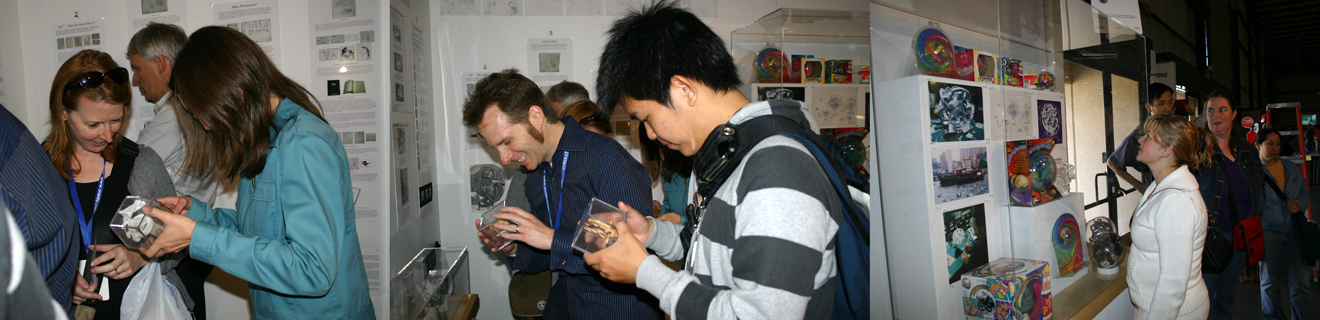
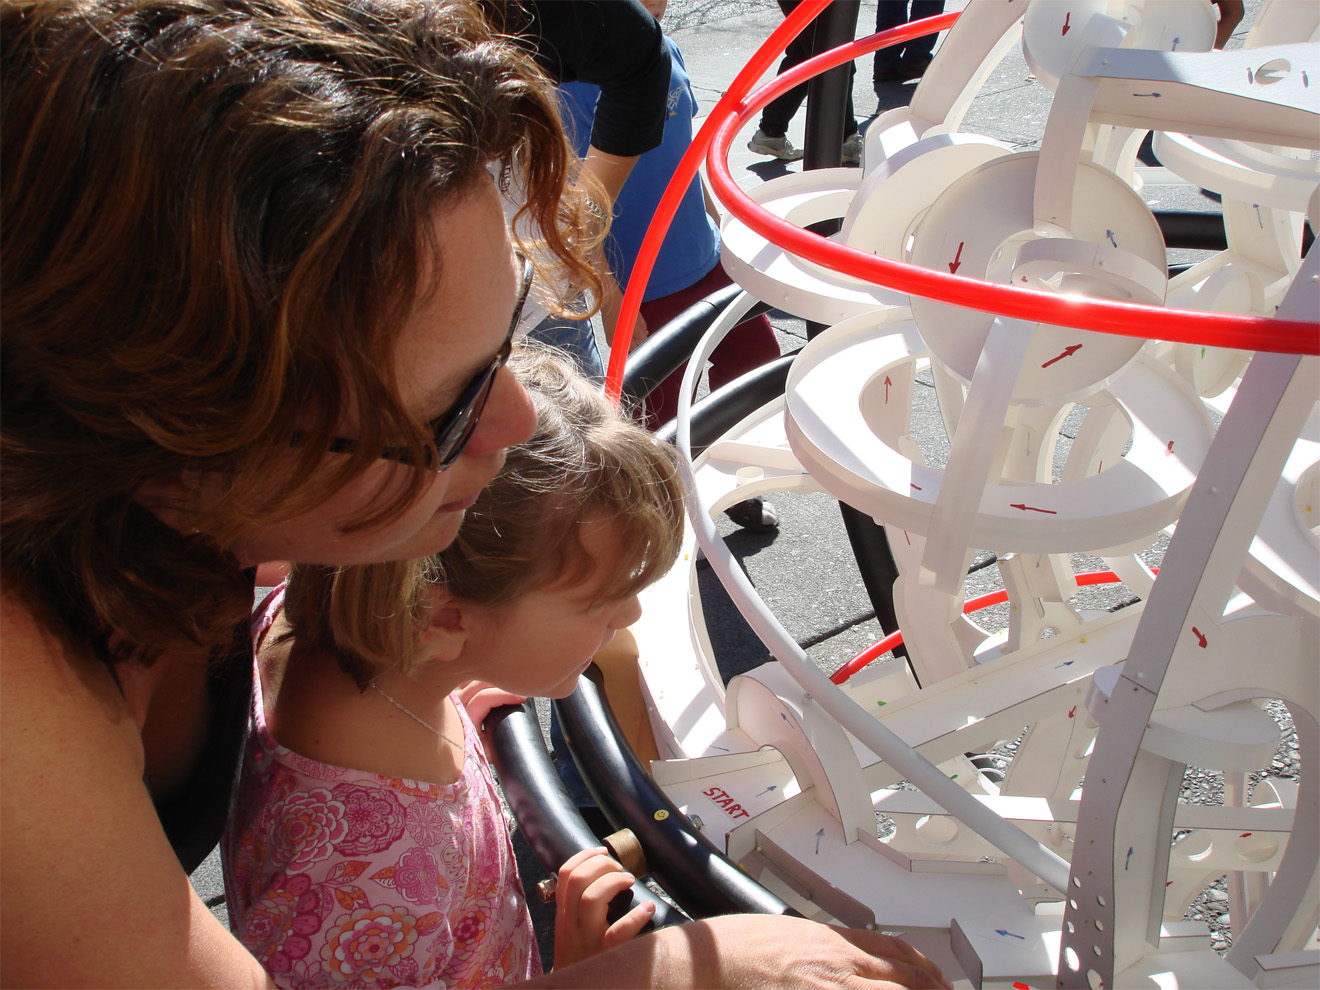
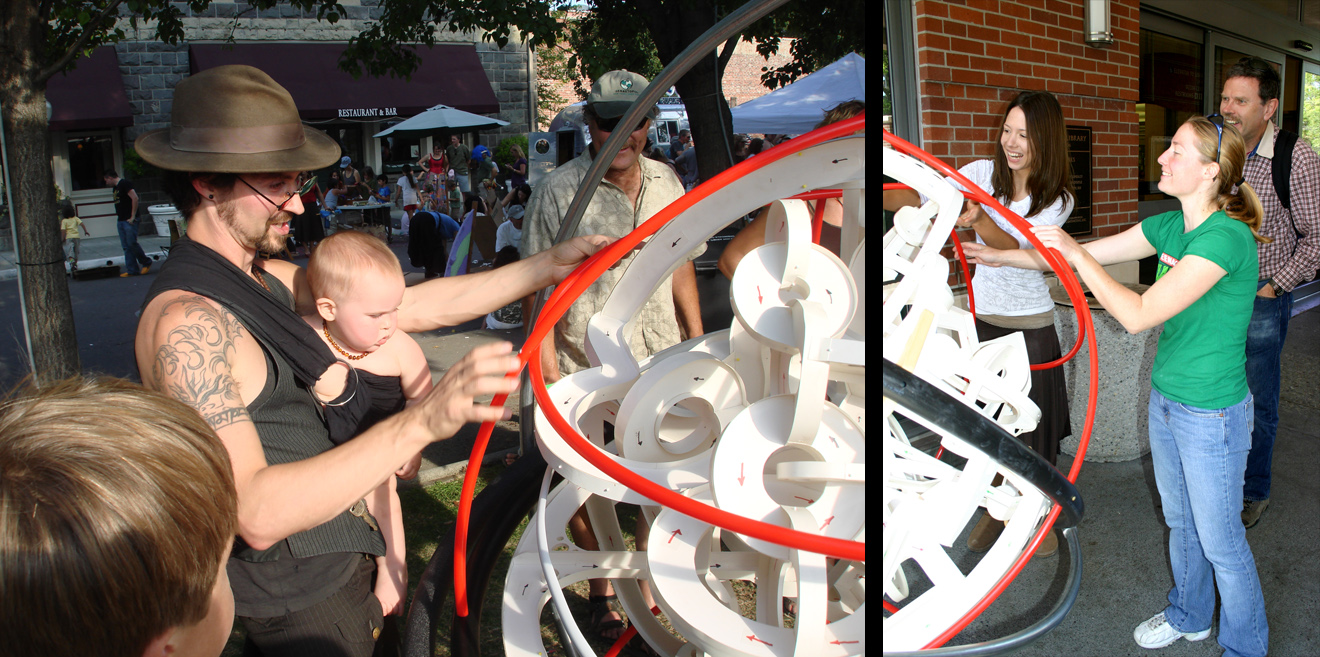
We were mobbed nearly continuously for the length of the faire. People of all ages steadfastly attempted to play through Circles, while respectfully handling its delicate form. I allowed visitors to handle many of my hand-made Perplexus prototypes, and had long discussions with many wonderful makers. I should have expected that some would want full plans of how to build their own Superplexus Circles, but I was not at all interested in this, as I was just embarking on my own artistic journey, and my piece was not a whim of fancy. My niece, Meg, and her now-husband Eddie, who lived nearby, assisted with manning the exhibit for several hours, which was essential and very welcome given the amazing crowds.
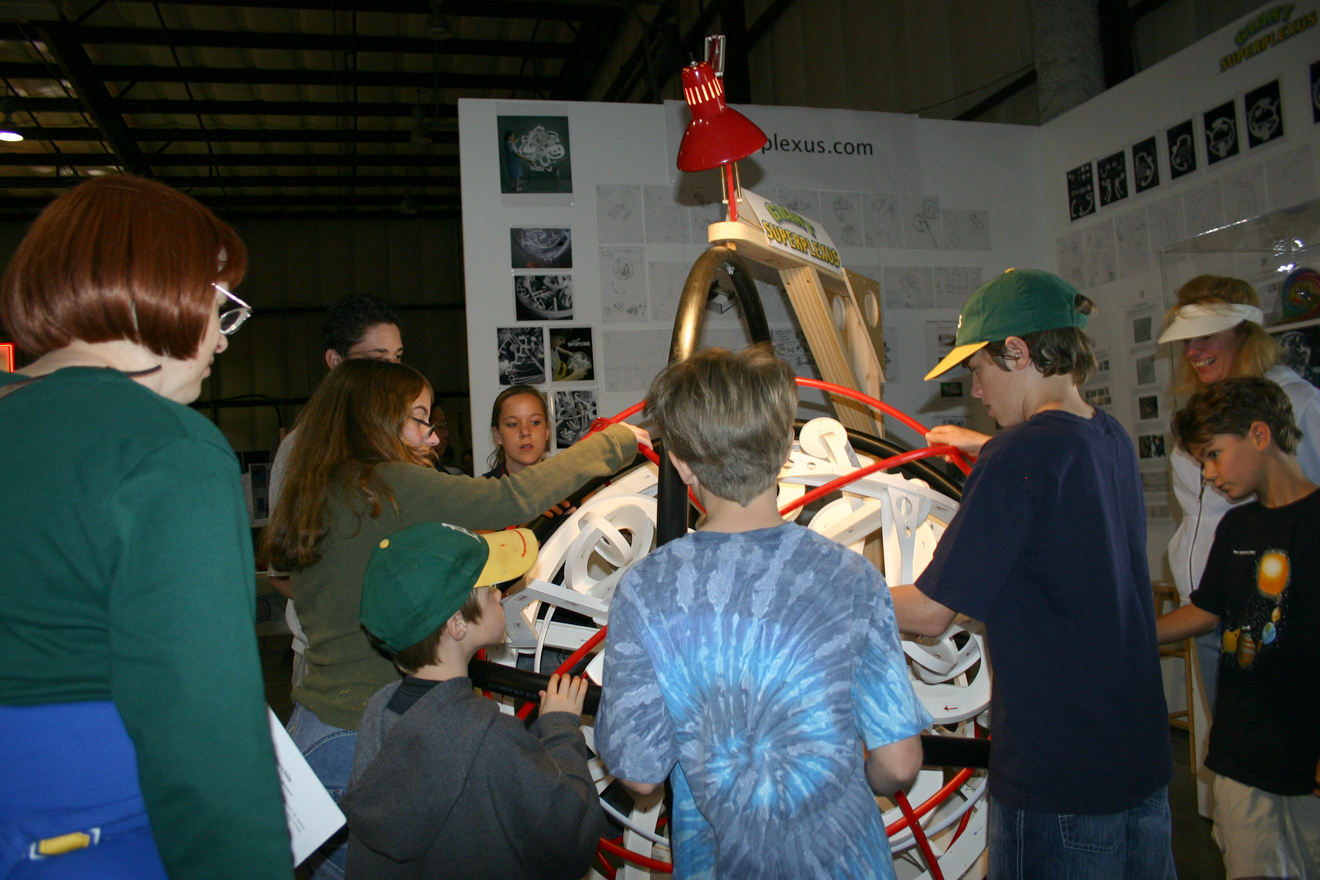
Exhibitors from the Exploratorium came by, one after the other, and expressed great interest in acquiring a Giant Superplexus for the museum. In fact, one of the exhibit builders suggested that he could work with me to build the piece robustly in PVC if I liked. Alas, an entrenched and ancient supervisor came to visit, with a dubious gaze, and asked what kind of educational value this thing had. I was exhausted from the long event, and flummoxed by his attitude, blowing the interview. I should have told him that its complexity helps people gain spatial awareness, grasp the interconnectivity between form and structure, wonder at the relationship of surface area to volume (this feature allows my 3D labyrinths to have great path length), witness the result of mapping and folding, and experience the joy of spontaneous cooperative play. These are things I have discovered myself. I am not a scientist or mathematician. However, I am an educator. Despite the curmudgeon, the Maker Faire was a rousing success! One particularly memorable moment was when a group of youngsters was working as a team to thoughtfully manipulate the Superplexus. I thought it was great that these siblings worked so well together. It turned out none of them knew each other at all!
Many other venues
After the Maker Faire, I was asked to participate in many venues. I wished to support the local community, and at the same time promote my concept. There were more offers near and far than I could do. I wish I had, including several more Maker Faires, but there simply was no time.
I took part in these venues over a four year period:
- Chalk It Up To Downtown, Santa Rosa, November 3, 2007
- Day Under The Oaks, SRJC, Santa Rosa May 6, 2008
- West End Neighborhood Picnic, Santa Rosa, July 19, 2008
- Heritage Festival, Santa Rosa, August 9, 2008
- HSC Conference, Sacramento, August 16-17 2008
- The Great Hand Car Regatta, Santa Rosa, September 28, 2008
- Railroad Scare, Santa Rosa, October 25, 2008
- The Great Hand Car Regatta, Santa Rosa, September 27, 2009
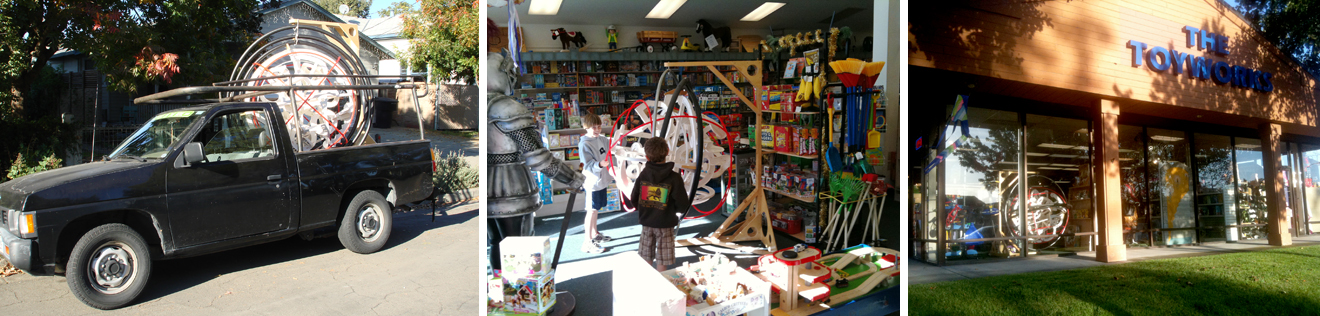
- The Toy Works, Santa Rosa, November 28, 2009
- The Toy Works, Santa Rosa Avenue, Santa Rosa, many months, 2010
- The Great Hand Car Regatta, Santa Rosa, September 26, 2010

During the Chalk It Up To Downtown event, I discovered that the plastic gimbal rings were sagging due to heat and weight. On warm days, the rings would form teardrop shapes, and the inner rings would drop enough to occasionally hit the bottom pivot bolt. In May of 2008, I changed the two outer rings to metal, and added a tension cable to the C-frame for rigidity.
To make the metal rings, I first built large curved jigs from MDF and screwed it down to heavy duty tables in the sculpture classroom where I teach. I purchased 1′ diameter electrical conduit. Each ring required two lengths, joined with compression fittings. Bending the rings against the jigs was physically demanding, and I had to reduce the curve of the jigs to compensate for the flex, or recoil, that occurred when the conduit was initially bent. I measured how far they sprung back, and then modified the jigs by the inverse of this amount. After re-bending, the rings were a great fit. Then for the Heritage Festival, I added foam pipe insulation to protect players from the metal rings.
Several families who were fans of Perplexus made treks to my shop to play Superplexus Circles after reading about it here and there. That was enjoyable.
Demise of the piece
Sadly, during a family get-together, two rowdy nephews got a little too comfortable with Superplexus Circles, and they crunched some of the main track structures in a friendly battle over control. I made repairs, but could not get it structurally back into shape. This was the beginning of the end for the piece. Since my shop was in constant use and too crowded, and the weather was nice, I left the Superplexus outside for a while covered with a tarp. Then one night the wind picked up and it rained very heavily. The inner track structure fell out of the gimbal, intact but so distorted it was unusable and unrepairable. On October 30, 2012, I cut it up and discarded the remains.
In retrospect, it is amazing to realize just how robust the foam board and paper Superplexus Circles really was. Many hundreds of players of all ages manipulating it over several years, both indoors and out, did little to damage its core structure. The arrows faded from sun exposure well before its final demise.